BARBIEOLDNEWGREENREDO--JUST A GRANNY HAVING FUN WITH DOLLS< DIORAMAS STORIES AND DIY

BARBIEOLDNEWGREENREDO

DIY Making Illusions: Rooms--Hut to School Room

AD-Free Blog

These Portable-Fold-up Rooms are easy for even the youngest DIYers.

What does the first Vickie's Vintage, The Vacation Hut, and the Schoolroom all have in common?


barbieoldnewgreenredo


Vickies Vintage-Fashion show


barbieoldnewgreenredo

Hut from Seven Days and Six Nights.


First Day of School---soon to be a new quick story.

Answer: Walls and Floors. They are all used for the basic room. 

barbieoldnewgreenredo

I start with a thick piece of foam core- I buy a few pieces when it is on sale, otherwise one piece runs about $6.00. I covered Vickie's floor originally in silver/gray poster board (Michael's) only 99cents a sheet. It's gold on the other side, which comes in handy for scraps. The silver matches duct tape perfectly, so I did all the edges in silver duct tape...super sticky and finishes it off nicely.


barbieoldnewgreenredo


Since I am doing a new permanent Vickie's, the gray floor got finished on the backside for the HUT.

I flipped it over and finished the front edge of the tile---like this. It's still gray and finished on the other side. 

Tiled flooring was a screen shot of actual tile samples, enhanced and blown up to 1"square tiles-perfect for doll scale. Multiple prints were made, cut, and then pieced together--taped for a tiled floor. I covered flaws where it was pieced with a marker. 

barbieoldnewgreenredo

Secured to the thick foam core, this tiled floor looks quite real.


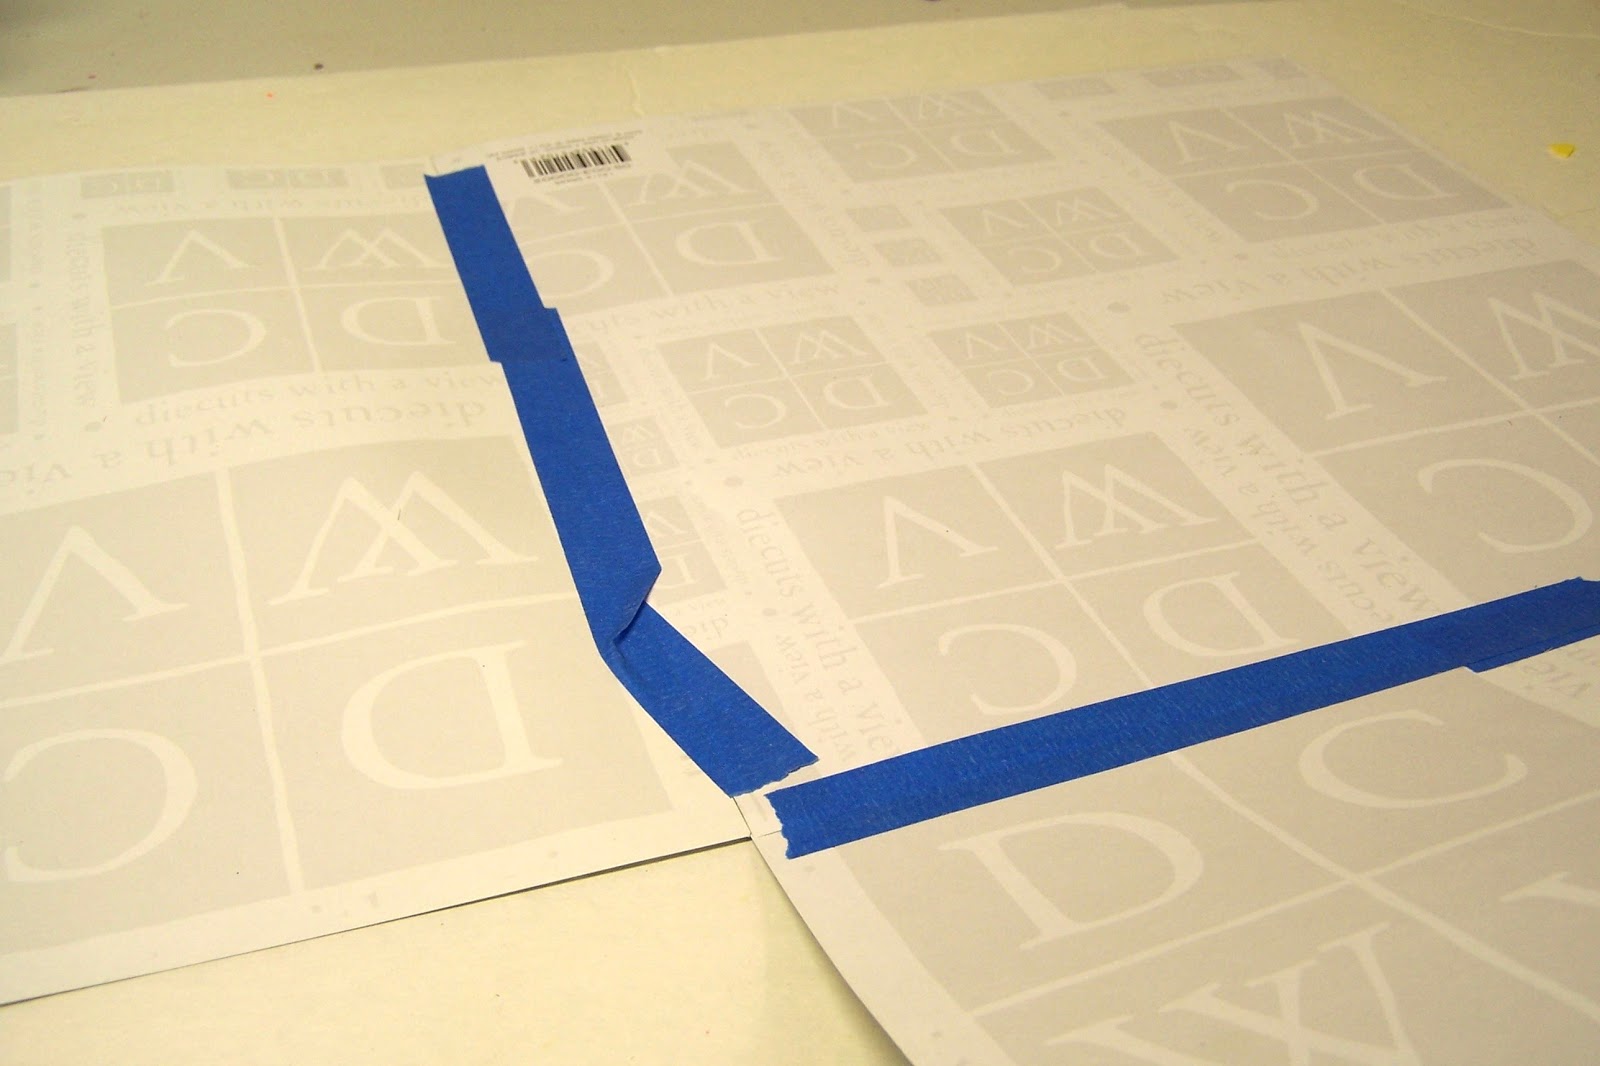
Walls are made of thinner foam core. Two or three full pieces will make walls for your floor, depending on the dimensions. I actually used the same walls for all three dioramas.

barbieoldnewgreenredo

Make three side walls to match the dimensions of your foam core. Nice thing about making your own--is you can go deeper than a manufactured room---allowing more play space and more realistic room settings.

So three walls of thin foam core, hinged with tape. This can all be secured to the floor with T-pins or Velcro. I use T-pins, but for younger children Velcro will work.

Here is some of the original Vickie's Wallpaper.  Cut your wall dimensions to allow for turning the corners and securing on outside of the floor.


barbieoldnewgreenredo

Here's the first walls of Vickie's covered in bubblegum pink wrapping paper from the dollar store.

Vickie's also was silver and white for the holidays and last Spring. The new permanent wood Vickie's will have a gray/silver/white theme and probably will not change for the seasons.

barbieoldnewgreenredo

Like many entrepreneur businesses, 
Vickie's went through many transformations with the seasons for two years. 

barbieoldnewgreenredo

Vickie even went purple and orange for Halloween last year
 to promote a charity affair, the Skeleton Bash.
While a new permanent Vickie's is being built I stole the walls and base for the HUT.

barbieoldnewgreenredo

The Hut used bamboo placemats on the walls and a green cloth placemat.


barbieoldnewgreenredo

Here I set the furniture up before deciding on the walls. This wasn't the final setup.

barbieoldnewgreenredo

 I simply draped the placemats over the edge and securing with pins. The bamboo was great for hanging items with hooks made from cut pieces of colored paperclips.

barbieoldnewgreenredo

Some items were simply pinned into the foam core, or double-faced tape to the walls.

Well, after three transformations of Vickie's walls and then the Hut...
I finally got really smart and covered the foam core with white satin finish Contact paper. 
This will allow easy removal of taped on wall treatments. 

I then used the same setup for the School room.
barbieoldnewgreenredo

Two placemats were used on the floor for a different texture. 
Since this isn't a permanent room, 
I taped the map and all the paintings with scotch tape, so they can easily be removed.

barbieoldnewgreenredo

This is a history class, so two pieces of scrapbook paper---
America maps...finishes off the white walls.


barbieoldnewgreenredo

Small vintage photos from a local calendar give the history theme a boost. A shelf on it's side makes a counter for printers/computers and cubbies for book bags. 

Hope this quick post gives you some great ideas.
I have used this room base and walls for over two years and probably 100's of photos and multiple seasons, and it is still going strong.  Maybe, it will be another apartment, tomorrow. 


Materials for a Fold-up Room:

1 thick piece of foam-core 
2-3 pieces of thin foam core for walls. depending on your dimensions

1-2 pieces of silver poster board for floor

Duct tape for wall joints and floor edges.

Paper Tile printouts----or scrapbook paper to finish the other side. 

A Roll of white Contact paper---to give walls a slick finish for taping to.

Wrapping paper, or Scrap book paper for wallpaper.

Double stick tape, or scotch tape for attaching things to walls.

T-pins or sticky velcro for attaching walls to floor.

Artwork/lights/furniture to make your room whatever you want it to be! 

Best part, it will all fold up and go away in storage in the thickness of 4 pieces of foam core. 


All the opinions and photographs in this blog are my own. I have not been paid or reimbursed in anyway for my opinions, posts or any products shown or anywhere I shop.

Thanks always for visiting. 
I will try and respond to every comment and answer every question.

 Please do not use photos without linking back to this blog without my permission. 

Share Your Cup
Pink Saturday
Amaze Me Monday
Wonderful Wednesday

Sharing at these Ad Free blog parties-with ads not in the middle of the blog (I'm going to try and see if this is possible)
Thank you for your cooperation, Sandi Magle
Sandi


DIY Making Illusions: Dioramas-The Island Beach and Waterfall

Ad-Free Blog

I'm really a novice at this---but, 
I'm going to show you some un-doctored photos and how I created the illusion of an Island Beach and Waterfall. 

barbieoldnewgreenredo

In the back you can easily see the seams of the paper photo. I used free stock photos from Morgue Files, downloaded and divided the pics by four pieces. I then enlarged each by the same percentage and printed them. I printed extra wet sand to put on the bottom, These are pieced and taped to the wall of thin foam core.

barbieoldnewgreenredo

The beach sand is actually just scrapbook paper again. I usually buy when they are 3 or 4 pieces for $1.00. 
I have some rocks thrown at the beach wall...but by placing my dolls and furniture just so---
the camera only sees what I want it to see.


barbieoldnewgreenredo

Here's a shot of the corner of the two diorama walls. 
This is how crude the taping is. I use Painter's removable tape. The right side is full of pieces of waterfall.

barbieoldnewgreenredo

Here you can see how small my beach actually is, but I can move the placemats and expose more sand. The plants are covering the house on the print and the uncovered white area. Bamboo place mats imply decking of some sort. The fence is a drainage rack for dishes, I use for lots of things. I moved the placemats and sand wider or narrower..depending on my angle of camera shots.


barbieoldnewgreenredo

I use many kinds of containers and either use tape, 
clay, or rocks to make arrangements of 
bushes or plant displays. 


barbieoldnewgreenredo

A plant to the left implies some jungle. Here the couple have just landed, and all their amenities are displayed on the fence. The large boat anchor---keeps your eye from the transition of the photo and blank wall behind the fence.

barbieoldnewgreenredo

I raised the angle of the camera to give 
them the illusion of walking up hill.

barbieoldnewgreenredo

On another day while exploring the island, Joe took some cheesecake photos of Vickie by the waterfall.

barbieoldnewgreenredo

From multiple copies of the same photo I enlarged, I  cut the repeated images creating the twists and turns of water falling over 
lots of rocks. I used a silver pen here and there to cross out things I didn't want to show. 
barbieoldnewgreenredo

 I had used the same wall of water for the Chicago Botanic Gardens Waterfall...I've doctored the photo and fuzzed out all the seams. I used the plank paper as a bridge under her, that worked well and added some floral 'bushes' because it was the botanic gardens after all.

barbieoldnewgreenredo

Here I had Vickie standing or sitting on planks next to rocks. Rocks hid the seam of the placemat, added some different plants and
 the bags distract the eye from the messy transition and Joe's clear doll stand.

Add caption

Undoctored photo and almost a boob-shot. 

barbieoldnewgreenredo

This one is better, a selfie-- I tried fuzzing out the shadows and then just decided they weren't too bad.

Add caption

Vickie and Joe in front of the waterfall...off to do more exploring. The helmets and handlebars show plenty of the bike...and you know they are going somewhere, fantastic. 

Next the vacation 'hut'. I bet Vickie and Joe never want to leave.

All the opinions and photographs in this blog are my own. I have not been paid or reimbursed in anyway for my opinions, posts or any products shown or anywhere I shop.

Thanks always for visiting. 
I will try and respond to every comment and answer every question.

 Please do not use photos without linking back to this blog without my permission. 


Sharing at these Ad Free blog parties-with ads not in the middle of the blog (I'm going to try and see if this is possible)


Best of the Weekend
Anything Goes Pink Saturday
Wonderful Wednesday
Talk of the Town
Vintage Charm
Share Your Cup

Thank you for your cooperation, Sandi Magle
Sandi


DIY Making Illusions:Dioramas-In the Park

AD-FREE BLOG

You may remember the backdrop above the HFIM house when it was in the bedroom. A very sketchy view of the Chicago skyline from the rooftop. I added a few artificial tree branches(ferns) between the walls and the two hand-painted foam-core boards.
Some of the photos I'm showing are unedited,
 so you can see the setups. 
barbieoldnewgreenredo

The painting itself, is more of a suggestion, much of it done with sponging, the buildings are watered down grays, with shadowing on one side and highlighting on the other. Very few details. 
The trees are all sponging---with some branch brushwork--here and there really quick and no details. 
These are views in the distance in relationship to the dolls. 

Below I used it on the table in the craft room, to create a rooftop party. 
Even closeup--the lack of detail, doesn't matter. It just gives the illusion of distance. 

barbieoldnewgreenredo

I tried to simulate late afternoon lighting, but this cast shadows on the backdrop. 


barbieoldnewgreenredo


Gray flooring(dull silver poster board) is nice and non reflective and gives a good illusion of concrete.


barbieoldnewgreenredo

Besides the new overhead lighting, now LED instead of fluorescent, I tried to use a spot light also...to give the illusion of a low sun. Bad part was shadows..on the back drop so nix that next time.

barbieoldnewgreenredo

Here, I used the same backdrop for 'the Park'. I did add some bushes in the corners to mask the edges. 
The painted tree tops become bushes. By lowering the camera eye---the buildings just seem tall behind bushes and trees.


barbieoldnewgreenredo

Add a park chair or two---I haven't done anything to either of these chairs. 
They are as found in thrift stores.
Left on the backdrop is the Hancock building and maybe the old Prudential builiding in the distance. 


barbieoldnewgreenredo

Stick a hot dog stand in the middle and you have a party in the park. 
No one sees the bushes are sponged paint.


barbieoldnewgreenredo

I don't make my artificial greenery permanent, its always in pieces. I use various containers as planters or modeling clay as anchors. Rocks are a great arranging tool in a container. They hold stems and fronds just fine! The grass is from 80% off grass/plant mats---from Michael's. Seems people dont' want to pay 19.99 for 1 square foot of greenery, but at 80% off I picked up two styles. Cutting the backing apart, makes great little pieces to tuck here and there. 


barbieoldnewgreenredo

Grass. I would love to be able to buy some real looking non-shedding grass mats, but.... Special order and 15' wide, is an option----LOL, if I were building a doll golf course. So, I use grass scrapbook paper, taped together with painter's tape---which is somewhat removable if you don't press to hard. 


barbieoldnewgreenredo

This is nice paper, most stores carry some form of grass paper. UPSIDE---the dolls don't have to balance on a squishy uneven surface.

barbieoldnewgreenredo

Set up---the paper seams basically disappear. Again, here is the rough set up of the park. 

Back Drop Materials List:
6 pieces of scrapbook paper-
2 foam-core boards from the Dollar store
Acrylic Paints or water color- green, yellow, black, white, brown 
sea sponge or kitchen sponge ripped apart irregularly
brush

Grass is 6 sheets of 12x12 grass scrapbook paper. Painter's tape.

Artificial greenery and 
doll chairs ...or benches.

Who knows who might show up?


Looking lovely in the park, Barbie says, 
"Have a great day, and I hope we gave you a few ideas."

ll the opinions and photographs in this blog are my own. I have not been paid or reimbursed in anyway for my opinions, posts or any products shown or anywhere I shop.

Thanks always for visiting. 
I will try and respond to every comment and answer every question.

 Please do not use photos without linking back to this blog without my permission. 

Sharing at these Ad Free blog parties-with ads not in the middle of the blog (I'm going to try and see if this is possible)


Share Your Cup
Vintage Charm
Thursday Favorite Things
Friday Favorites
Anything goes Pink Cupcake
Talk of Town


Thank you for your cooperation, Sandi Magle
Sandi