Ad-Free Blog
One thing in the doll 1:6 scale world that is lacking is definitely lighting. If you do find a lamp--it's tiny and looks like a little lump. Lighting for 1:12 doll houses is plentiful, once in awhile you can make one work, but not really. I roam everywhere looking for parts to make things...and I found some goodies in the party department at the Dollar Store.
I'm not totally nuts, but I think my dolls should have light to read and work by. I've rewired the GrandView main floor. But I think some lamps are needed in all my buildings.
See the little snack bowl on the lower left..six to a package. They are too big for doll bowls, but what about lampshades.? 6/$1...lol.
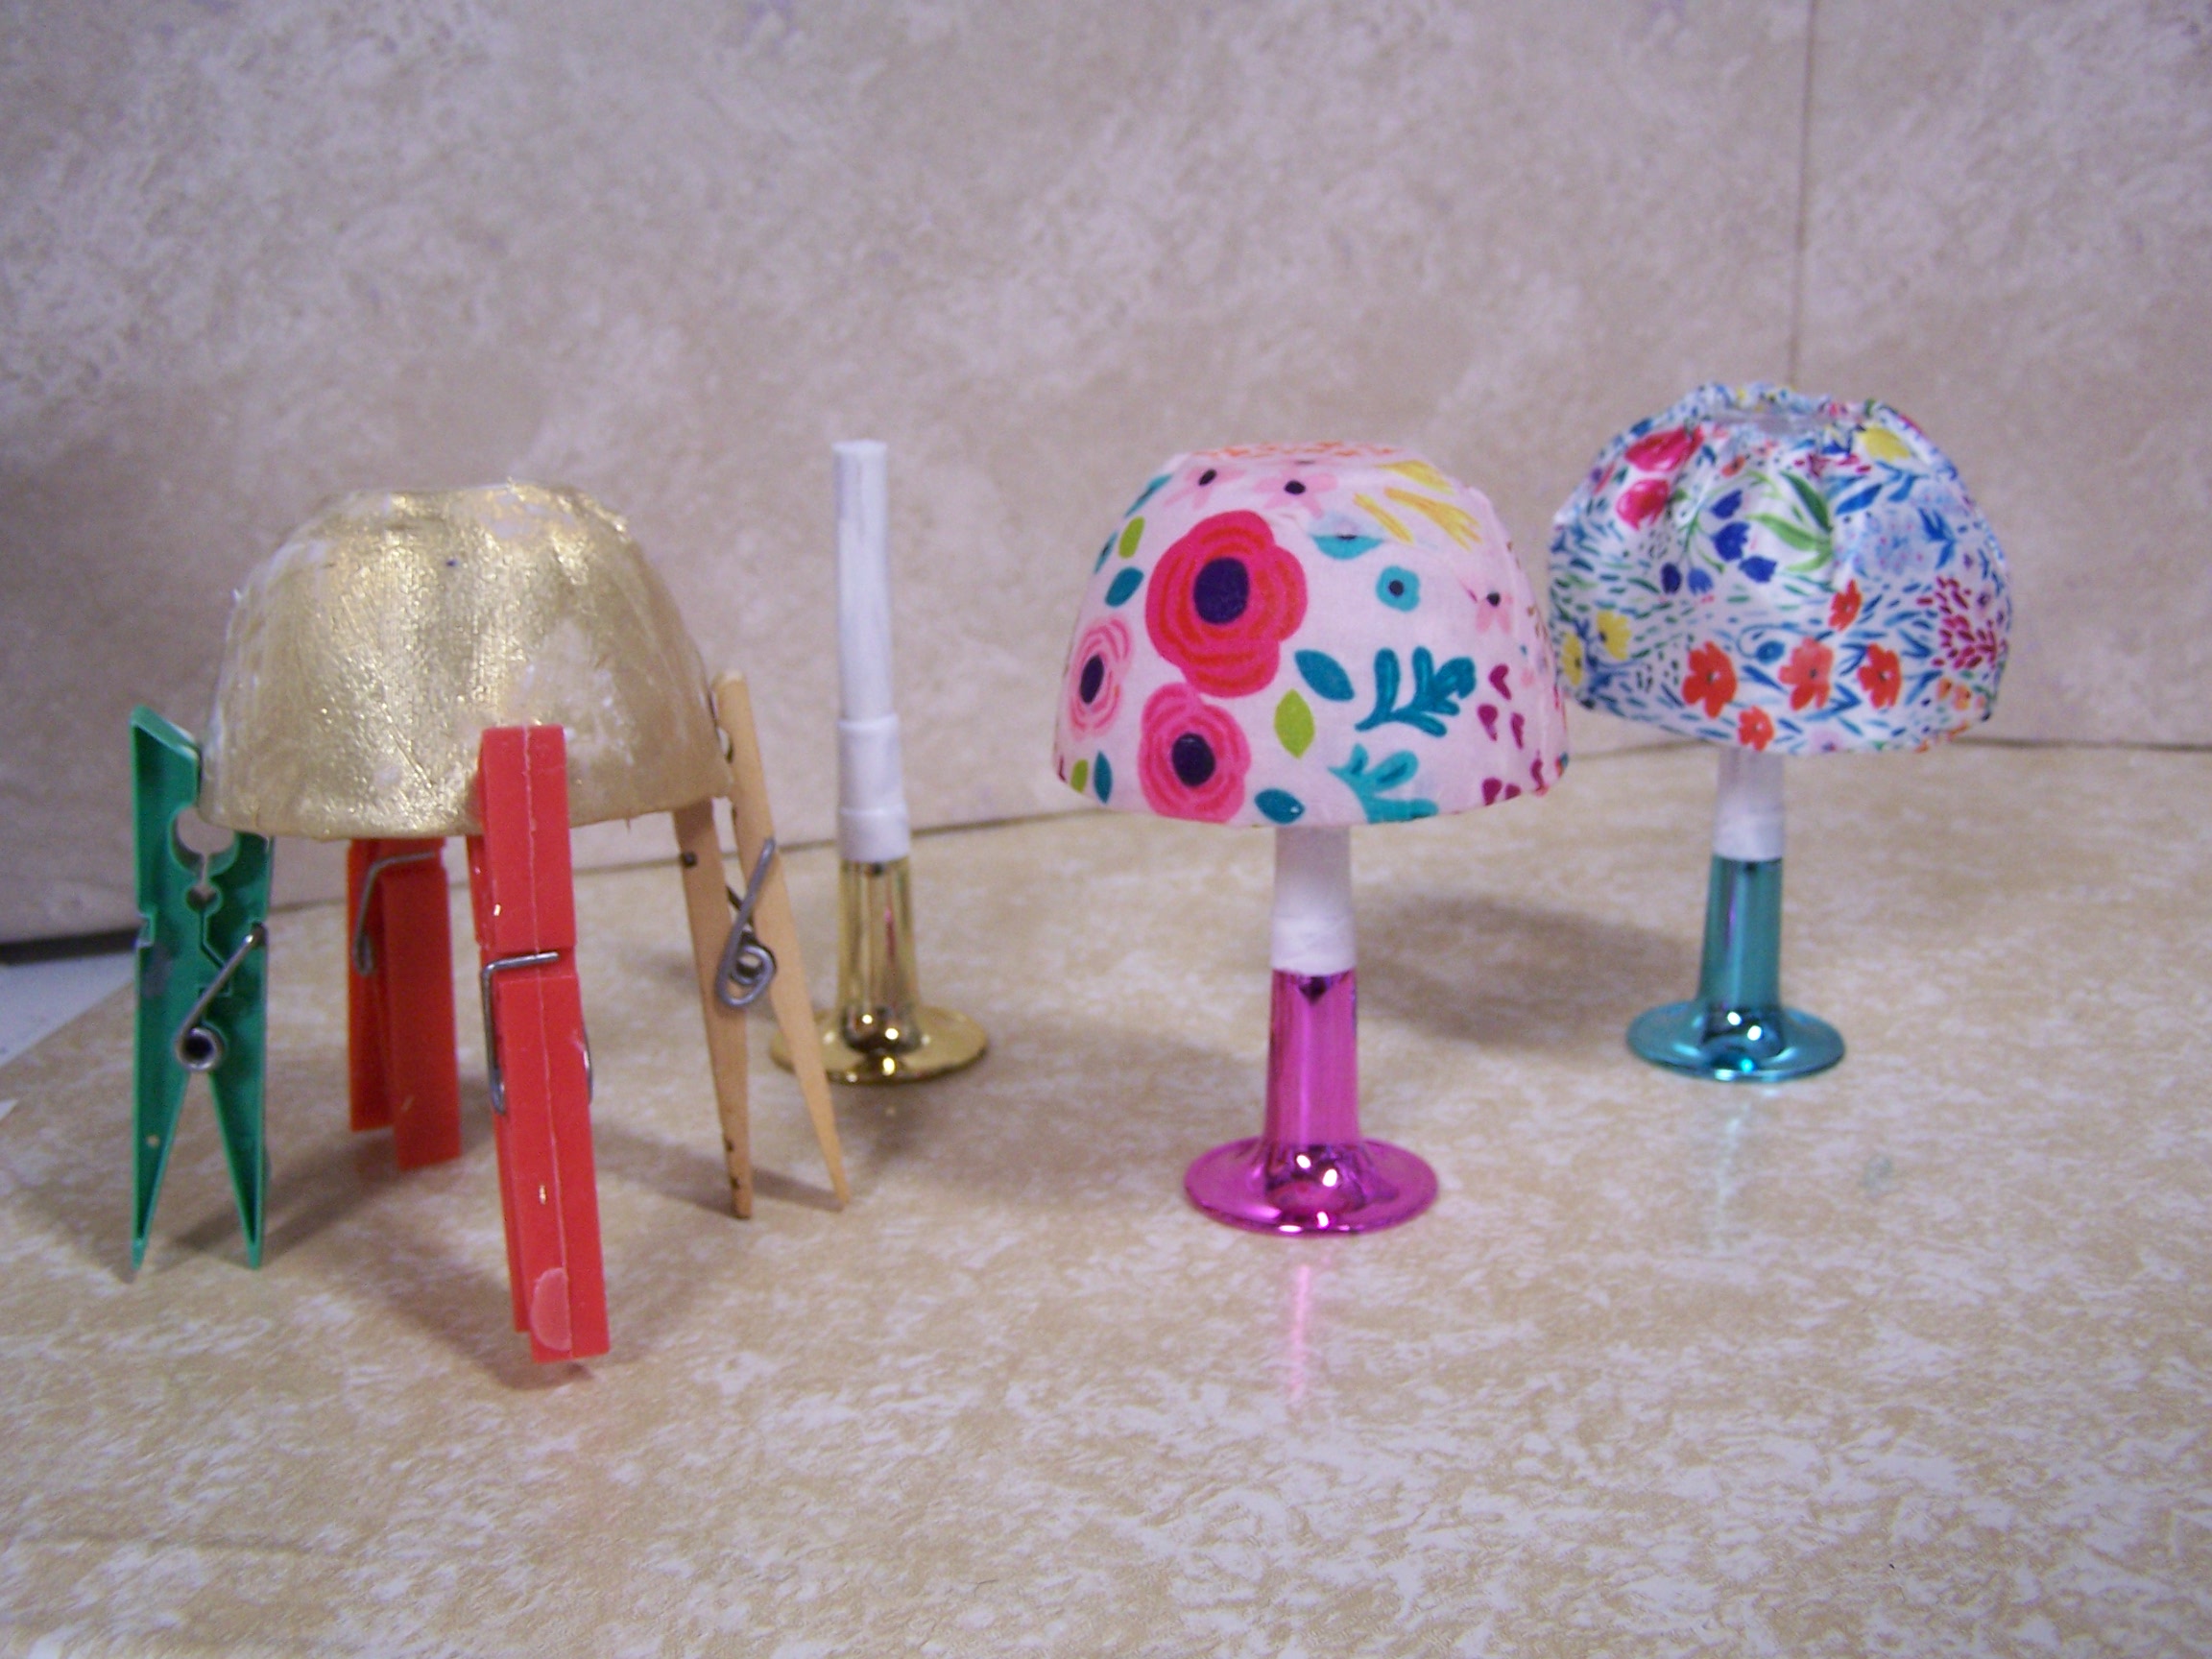
And of all things---Six party favor whistles in metallic gold, blue and Barbie Pink. what about lamp bases? 6/$1
Here's most of the tools and supplies I used...gel glue, a hacksaw and mitre box, icky brush for Modge-podge, and good brush for acrylic paint, sandpaper, the bowls, the whistles, scrap fabric, or 2-1/2"wide wired ribbon, a length of dowel, width that will fit inside the whistles and a hot/low glue gun. Dollar store sells shiny modge-podge for $1, I had matte which I like using.
TIP: Make sure you leave the straightest end on your dowels for the top and flat to attach to the bowl (lampshade).
The whistle wasn't tall enough, I looked in the hole and there was just enough clearance to twist a dowel inside with some super glue (gel). I cut six pieces to length for the six whistles. I then painted the wood white to match the mouth piece, it took two coats, (my dowels were old).
TIP:Before you paint on plastic or use decoupage, you need to clean the surfaces with alcohol, heavily clean. And wipe your hands too...think of it as sanitizing. Plastics often have an oily finish..and this removes and makes the surface ready to work on. So I cleaned the bowls thoroughly before starting.
I knew the round shape of the bowl, might be tricky so I tried using the gold lame (success), some printed cotton (success), and one ply of a napkin( fell apart).
Other decoupage materials: scraps of tissue, stamps, thinner bits of scrapbook papers, twine, colored yarn, just about anything. You know the drill.
Drape your material around the bowl and measure at least 1" past the edges of the bowl. Then cut fabric into a square.
I apply glue very thickly to the item I'm gluing to. Starting at the top center, place the fabric on center. The bowls have a little indentation which is perfect to really saturate. You could leave this center part glued down, until a bit dry and then move on to the sides.
When you are ready to start the sides, pull a corner down first with lots of modge-podge underneath. The bias of the fabric will stretch to smooth out on the circular form. Smooth out as big an area as you can. When the fabric begins to buckle at the top make a cut from the bottom edge all the way up to the top-bottom of the bowl. The straight grain side will not stretch as much.
Apply more modge-podge and overlap, or in the case of a print cut around the pattern parts you wish to see. Do the next corner piece cutting up as you go, rinse and, then repeat all the way around. You should have to make 5-6 long cuts. Every piece of fabric stretches a little different, and patterns may necessitate less or more cuts.
Add one more coat of decoupage to finish the outside off.
Here is the still wet bowl, I've trimmed excess across the bottom leaving not quite a half inch to turn under. Make cuts to the edge of the bowl...as shown every 3/8-1/2", brush on more goop and turn under moving from left to right. If your fabric pops up secure with a couple of plastic clothes pins, or bits of plastic bag under teeth of wood ones. These won't leave a visible mark on thin fabrics and will easily remove.
Now, remove all the gunk from your fingers...it should just peel off. Scrape with an old wash cloth or rag, avoid clogging your drains with dried paint products.
When the modge-podge dries, you can always do another coat to even out the finish. I liked matte finish for this project...because the fabric looks like it's original finish.
I attached the base to the shade with a big gob of hot glue, while holding the base straight. Count to 40 and it should be stable enough.
The gold fabric was a bit tricky.
And, I confess gave me some grief. But, once I realized the shreds could be trimmed off or would fade away into the decoupage surface, it worked great.
Here you can see the finish around the bottom. I added some $1 store 'sequin' trim I cut from wider. I hot glued a single bead width on the top, double on shade and double wrapped around the base. Who doesn't love a little BLING!
Surprisingly, you can't even see the seams on the gold fabric. Here I show the trim as it comes off the roll.
Since the paper dotted napkin didn't work (turned to moosh), I looked around for something different. I had just bought a couple of spools of Spring ribbon on sale 70% off, and I thought cool,...a poofy shade.
This is the least messy, but you really need 3 hands...Hubby rescued me...
First make sure your ribbon is a bit wider than the outside measurement of your bowl. You need at least a 1/4" to turn underneath your bottom lampshade edge. Cut your ribbon 1-2" wider than the bottom length of your bowl. Carefully pull the wires on each end (top and bottom-4 ends), and bend them over so they don't disappear again into the ribbon.
Starting with the top edge...pull the wire to ruffle the fabric from both ends, you will want to pull it until the fabric ruffled ribbon measures a bit more than the circle bottom of the bowl (top of the lampshade). Twist the two wire ends together. Hot glue the wire's edge to the bottom edge of the bowl(the top edge of your lampshade)
.
Turn bowl over turn over. Fold the cut edge of ribbon over 1/4" and hot glue to the other end raw edge. Press this seam down with your finger and hot glue. Hanging on to both wires of the bottom of the ribbon, gently shirr the fabric until it is almost tight on the bowl edge. Pull fabric into the inside of the bowl, tighten the wires and twist the wires together inside the bowl. Trim wires and fold under fabric, then secure fabric inside the bowl with hot glue. Hot glue anywhere it is needed.
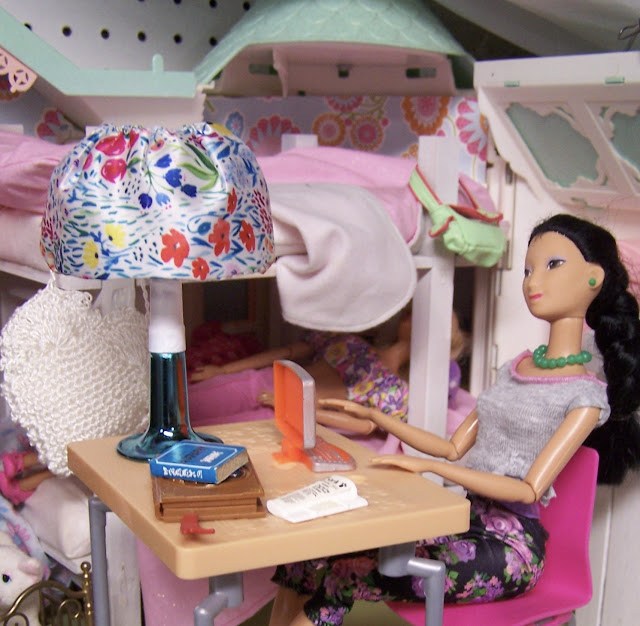
Isn't it adorable...Here it works on a desk, but I moved it downstairs into the dining room, because of the blue. (PS--Mulan lost her kabuki makeup-it took a lot of alcohol and scrubbing, and is still in need of some new lips and eye touch-ups, soon.)
This lamp is scaled better than the doll lamps available...and very sturdy. I thought of gluing a washer or two for weight in the base, but so far the girls haven't needed to.
Hope you enjoyed this DIY, I really want to try some other shapes for lampshades...stay tuned.
What NEW thing from OLD or Cheap have you made for your Doll World?
If you enjoyed this post, please join me by email- at
FOLLOW IT---upper right hand corner. You will receive on email per post, and that's it from me!
Please Join me at these Fine Blog Parties!
Thank you for your cooperation, Sandi


Cool, I think I like the poofy shade best:@) Have to chuckle, I have a lamp idea tucked away too, still kicking around the shade... They look great in your dioramas!
ReplyDeleteJust a bunch of possibilities, I'm going to try and do a few different ones. We've had intermittent power outages..because of storms, was out for 14 hours..and now flickering again. Good luck with your idea! Sandi
DeleteI love the lamps! And if they do become top heavy and unstable, you might try using ceramic magnets to weight the bases. (American Science and Surplus sells many sizes!) These work amazingly well if you are doing floor lamps, microphones, or any number of tall decorative pieces; because they provide weight for stability. And if you want to go really crazy about securing your props ... try using a sheet of thin galvanized metal as your flooring and table surfaces to take advantage of the magnetic force! Those lamps and props will stay in place ... and you avoid the gooey mess of tacky wax. Metal can be painted or covered with thin decorative papers without affecting the power of the magnets. Have FuN!! ... That's my STEM trick of the day ... (Luke, use the Force!) ;-)
ReplyDeleteOMG, what a great idea...so far they are okay, we will see. I use papers on the doll stands so they blend with the floors!
DeleteWhat a great idea! My girls would love this. They are always busy making things for the barbies. I spy that the previous post you show us how to do shoe boxes - now this is something the eldest one would appreciate (the littlest is always loosing her shoes.. I think half go up the hoover :0 ) Lulu x
ReplyDeleteCute comment, I try not to use the vacuumn in the doll room-- for that reason--_I know the shoes take a trip on the floor! Hugs, and thanks for stopping by, Sandi
DeleteHi, Linda...thanks so much for stopping by. I was looking for a couple of other posts on lamps, I thought I did. Oddly can't find them. Have fun with the diorama, I'm sure you will come up with something so tres chic it will knock my socks off, and my dolls will be jealous! Hugs, Sandi
ReplyDeleteWow, Sandi...that is really cool. I think us doll people have special eyes and special brain functions when it comes to spotting ordinary objects and how they can be used in the world of a doll. Others might see a top or a cap, but the doll person sees it as a lampshade. How cool is that! I'll be interested to see what else you come up with!!! Big hugs. April
ReplyDeleteOh,April, thanks. I have a couple more ideas in the workshop. It's fun to improvise...I've been working on plants/plantings and that is interesting, too. thanks for stopping by, I like that these are MOD..and I can't wait to make some for my little Mod house! Big hugs back, Sandi
DeleteYou are so Clever my Friend! My Mom had a Friend who really was into miniatures and made a lot of her own, the amount of work and creativity that goes into it made me realize why buying miniatures can be so expensive. I like looking at the miniatures for sale in the Craft Stores and the Dioramas people spend so much time and patience creating to make them look so real... it really is a labor of Love! I'm finally catching up on Blog Posts so now will trawl the Archives for those I've missed while I've been running behind.
ReplyDeleteOh, thank you---I trawl your blog for inspiration and you always have so much 'eye candy' it's amazing. Especially when we can't get out into the real world. I have been having some fun---and neglecting everything else. Thanks for visiting...smiles, Sandi
DeleteOh so good idea you are so creative, this looks so pretty
ReplyDeleteThank you very much, it is a fun and easy project for your dolls!
DeleteBeautiful blog
ReplyDeleteThanks for stopping by, Sandi
Delete