
AD-FREE BLOG
It's no secret I work in 1:6 scale, often called play scale which means 1 inch equals 6 inches in doll world.
Our WINDY CITY DOLL COLLECTORS CLUB celebrated their 30th birthday this year. This event was basically swallowed up by our hosting the National Barbie Doll Convention in July. We did have a lovely and delayed dinner party at convention, and it was the first time we could all be together since Covid started.

In celebration of our club's birthday, this December's meeting will be a holiday event and also a workshop for some 30th Birthday projects. Working on a limited budget and making something special...means working with easy to find materials.

What could be more fun than personalized than Birthday cakes...and a cute cake stand. While painting as a group activity is fun, this dimensional paint needs DAYS to set up properly. Since we are mailing out kits to our out-of-town members, I'm doing these way ahead of time.

I've used a pink, custom-mixed color of Puffy Fabric paint after totally cleaning all the caps with alcohol to get some good adhesion. When mixing colors, remember that they dry darker than what it looks like in the mixing cup. If you have to rematch the paint for touch ups...keep that in mind. These did need some touch up as the paint shrinks a bit around the piece, and exposed some of the ridges of the caps. I did four coats and still seemed to be thin in spots.

I always have a huge stash of bottle caps...the trick was finding 30 of anything that matched. I've done another post on making cakes, this is just an extension of this process. These cakes were two stacked and glued together with a wide bottom tier, and then a multi-level prescription bottle cap on the top.
We have a personalized Windy City sticker for the white top---which I have given 3 coats of white acrylic (you can still see the shadow of the prescription print) but this will be covered with 'pearls' that the members will attach at the meeting.
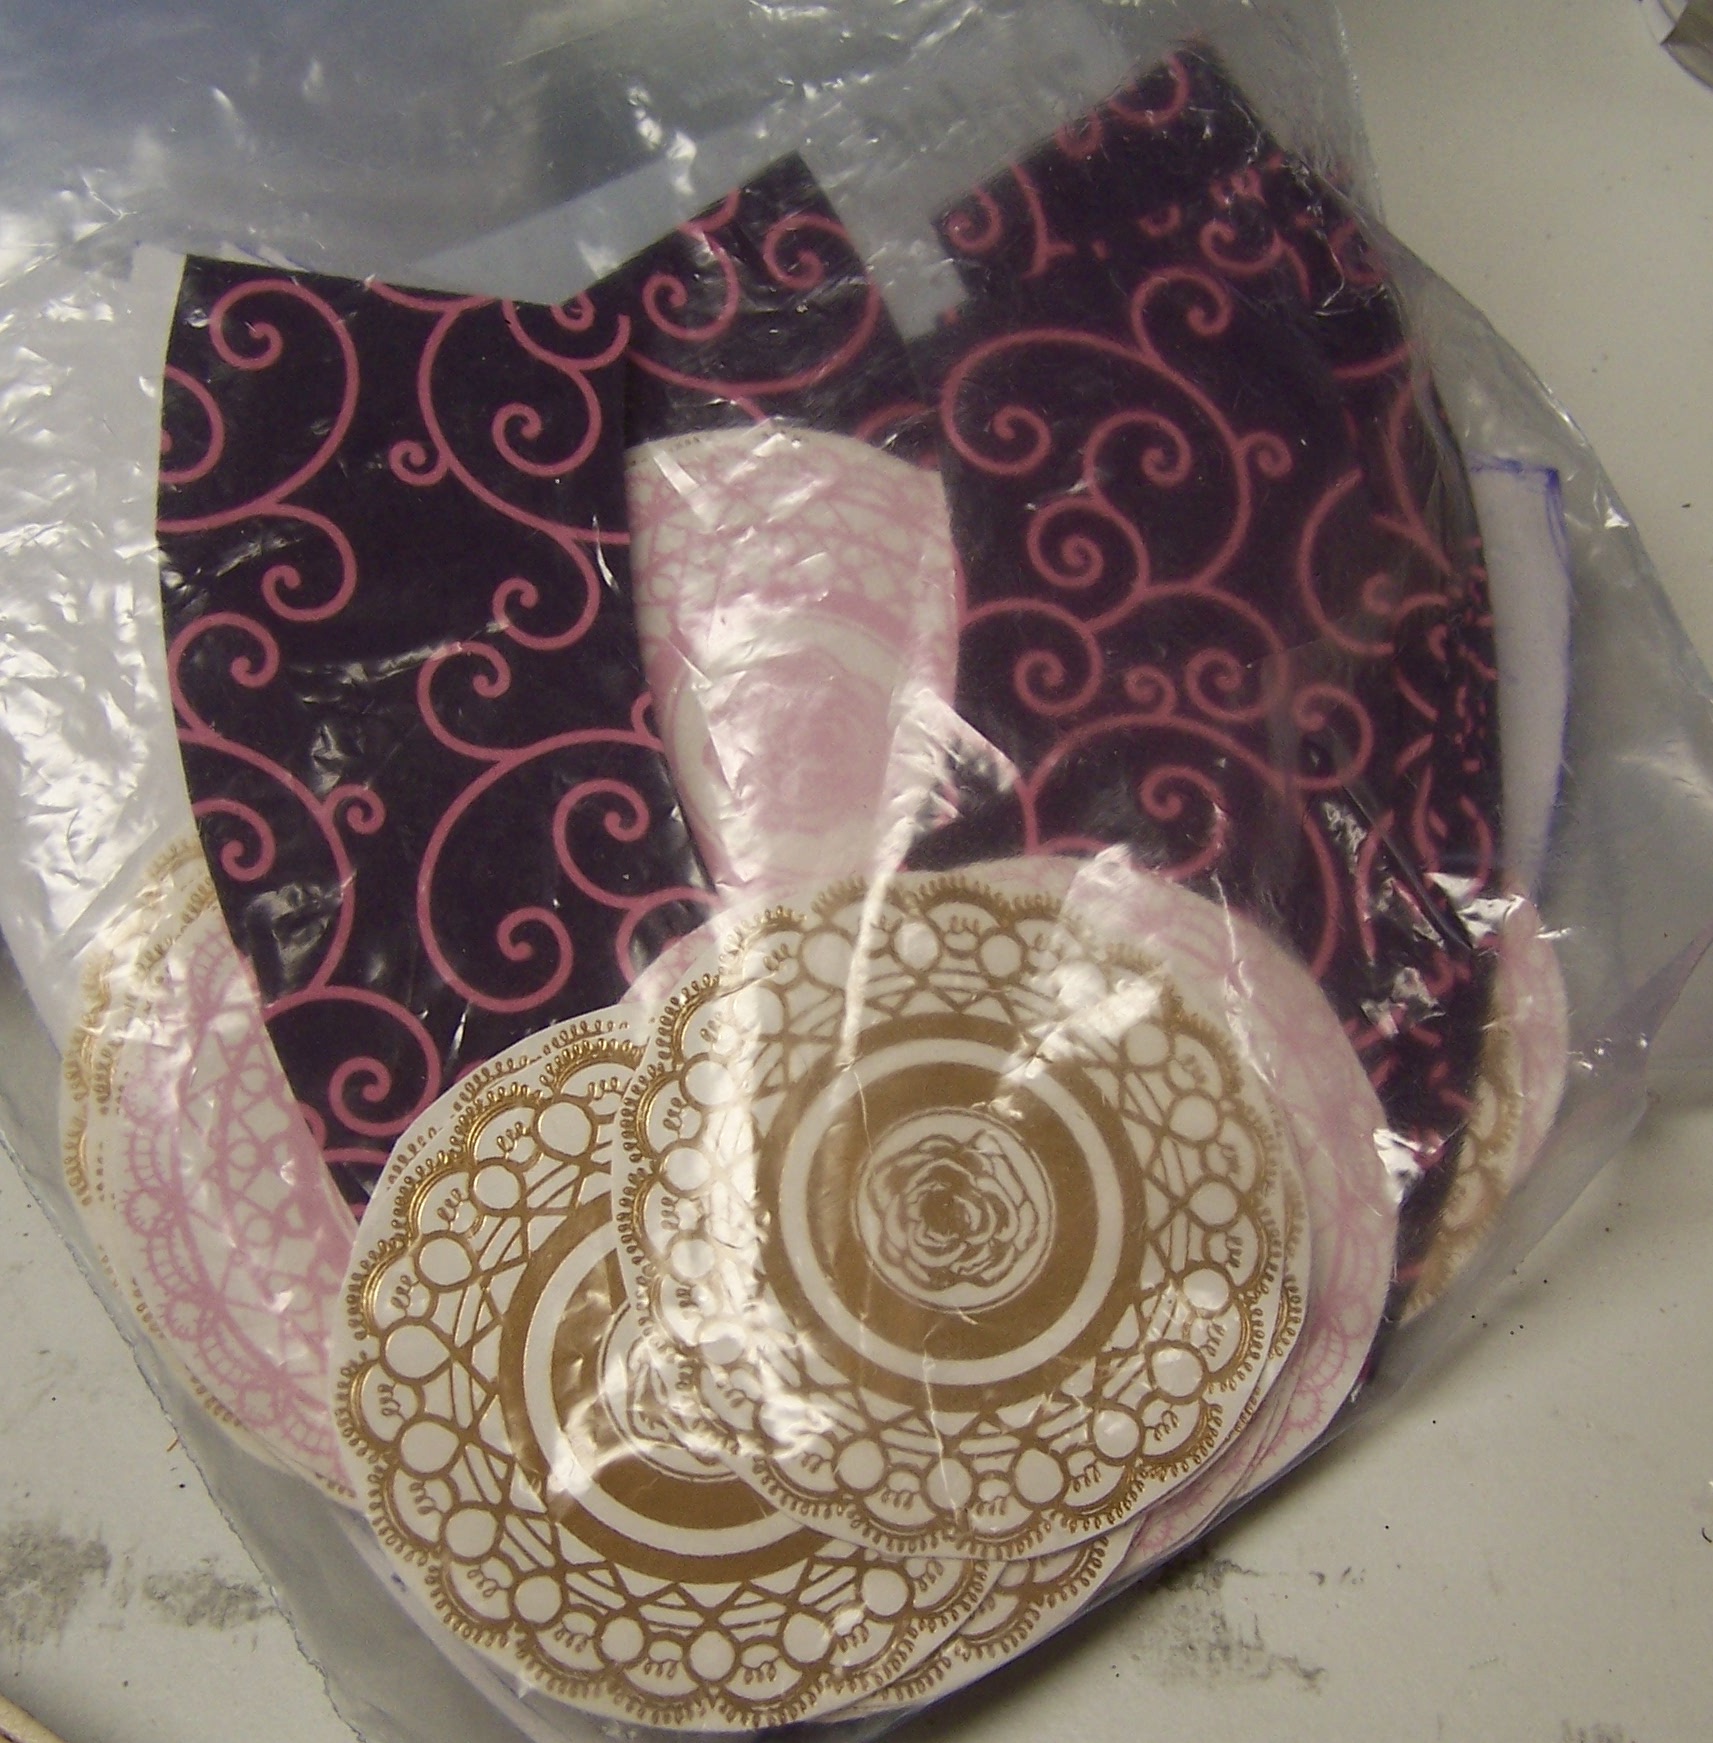
With other projects going on also---I've pre-cut the papers for the base and tray of the Cake Stand. I had this great paper that looks like doilies, and they just happen to be the exact size for the lids/or tray of the cake stand. ( looked for doilies for a cake stand or plate for over two months---this was the only option at this point within the budget).
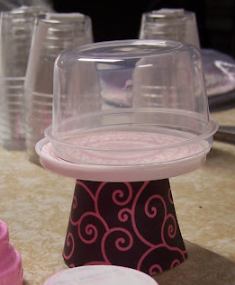
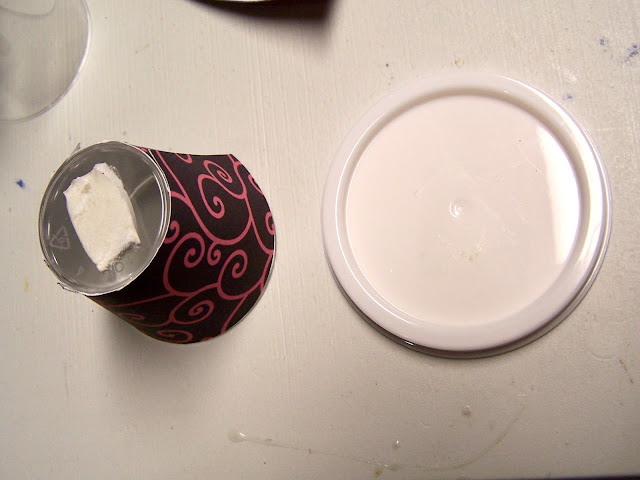
The cake stand base is a plastic shot glass, and the covered tray is an upside down mini-storage container. Both are from the $$ store. I've pre-drilled a hole in the lid, and will have some sort of handle bits and pieces added to the kits.

Shot glasses with double-stick foam tape attached. I've also added a strip of double-stick tape to the side of these 'glasses'. And, also added a strip to the paper.
When working with large groups---eliminating the sharing of tools by prepping it all up...really helps. They will be very busy gluing pearls cake and a few other projects, including an ornament and a teeshirt and super cool glasses!

At home, my most often used supplies are Double-stick tapes: foam, skinny, and wider 'scotch' double-stick. Upside, these all are removable, so you can change your mind and redo an items when using it. And tapes are not full of odors and harmful ingredients for group use, even for kids.


Let's put together, JUST ONE!

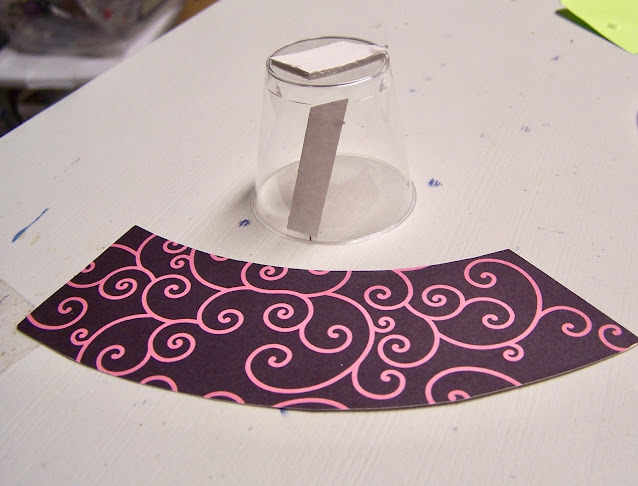
I made the base cover---by rolling the cup on the backside of scrapbook paper, and tracing the bottom edge as I went, then doing the top. I made one edge straight, and the other cut on the slant so you have a good overlap. You can even do it with some card stock---to make a pattern. Fit and trim the pattern as needed---then trace on your chosen paper or sticky vinyl. I started with the straight edge for gluing to the cup.
Trim the edges if necessary.

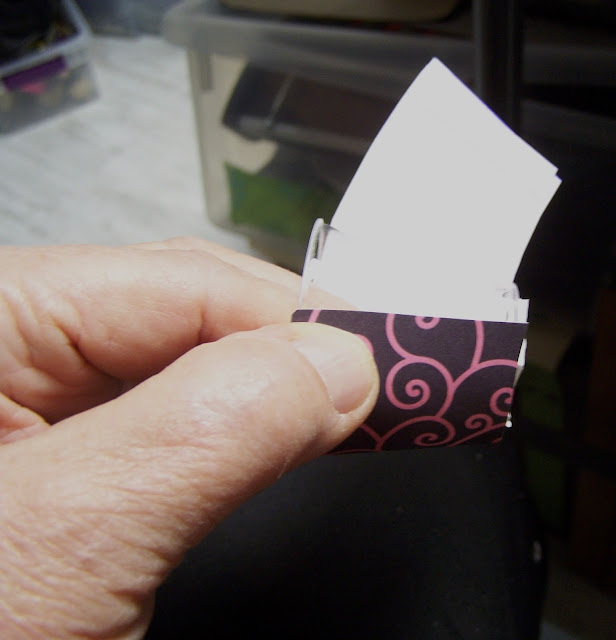
I used double stick tape, the full length of the cup.

Also apply double stick tape to the slanted end of the paper, press well into place. You may have to do this more than once depending on how stiff your paper is.

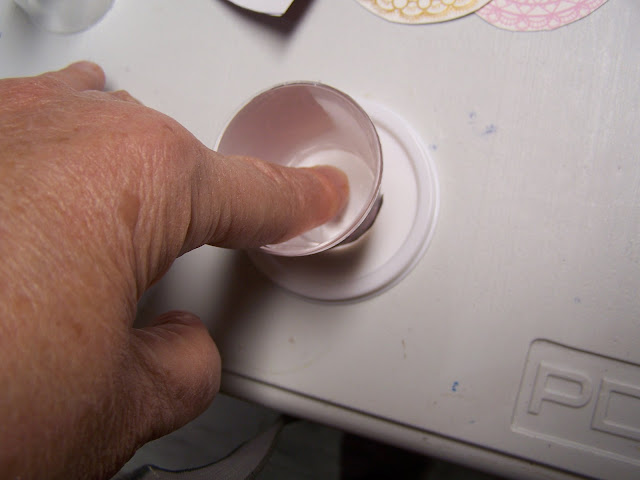
I used thick foam double stick tape to attach the lid to my cake plate. You may have to use two thicknesses of tape to do this.

Carefully press the cup to the lid---(the upside of the lid to the cup)

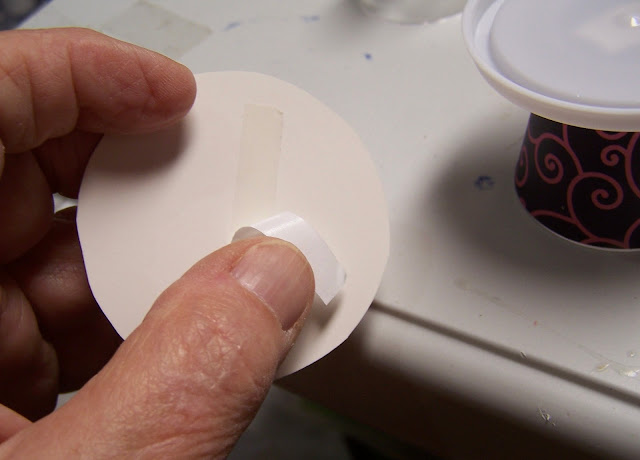
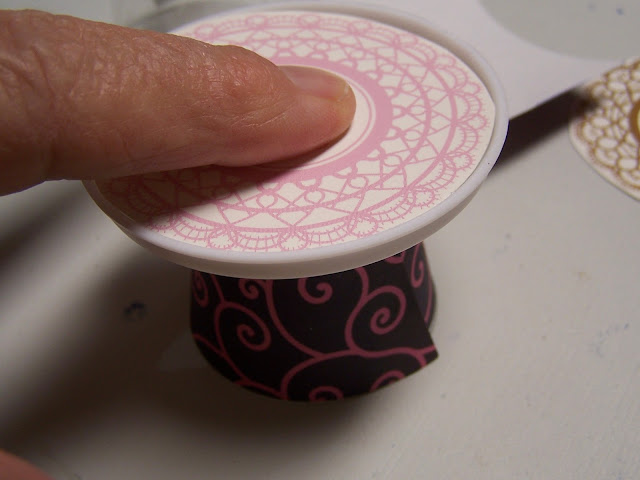
Again, I had found some doily shaped pieces to use---which were on card stock and trimmed to fit. I simply attached this with a strip of double-stick tape. You can use anything or leave your plate white.

If you want to make this all permanent by all means use your favorite glue. I love Gorilla gel glue and E-6000 for multiple medium projects.
Now you can see why we use the inside of the lid for the cake plate---it gives a flange for the dome to sit on.

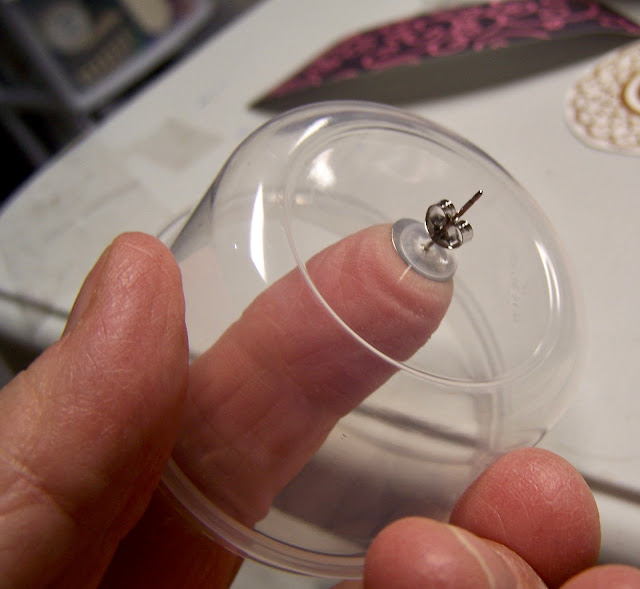
My lids actually had a circle spot in the center of the lid, so I drilled the tiniest of holes through the plastic. You could use an awl and pound a hole through the plastic also. A thick darning needle would work also.

Next, I used a pierced earring back with a long post on it. Added a dab of glue and pushed it through the hole in the 'dome'. The earring back is perfect for holding the post straight up, and I snapped that in place with a tiny bit of glue.

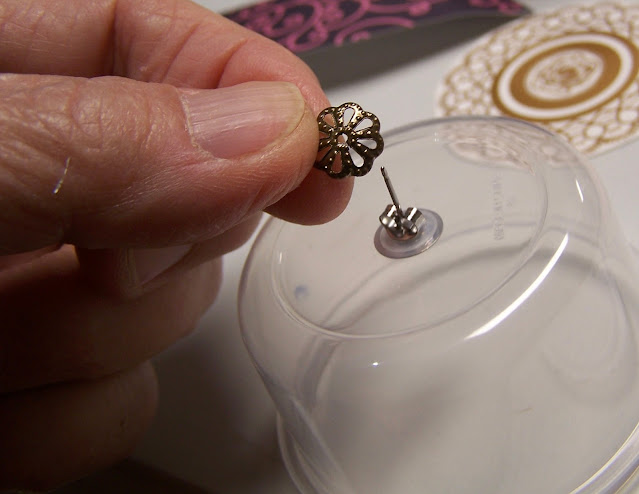
I did purchase these bead covers---in a huge pack, because I needed 30, but any bead cover that will hide the fitting will work.

Glue in place---and this will hide your fittings.

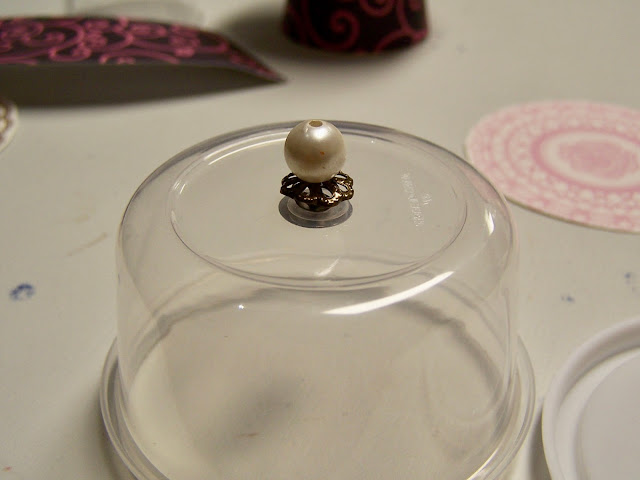
Since 30 year anniversary was pearl---I used a pearl glued on the post, and added a tiny bit of glue to the hole.

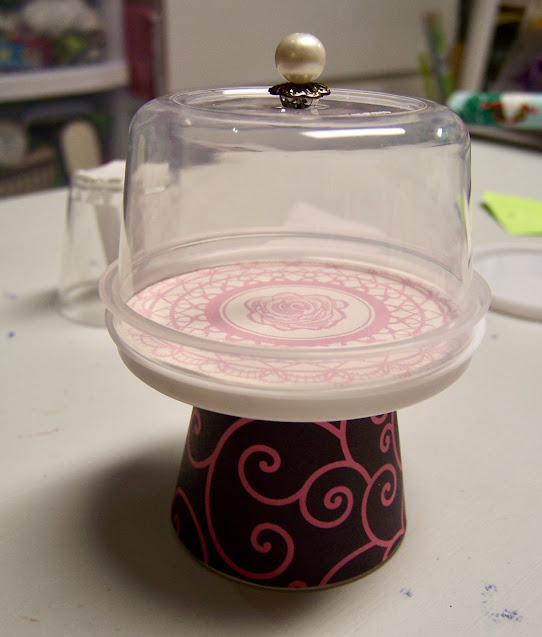
Here's your finished Cake Stand---finished. Perfect for celebration parties, a special treat, or even a Christmas scene. You could glue it all together for a permanent display---but how much fun will this be for your dolls to bake something different for the seasons.
Next will be the cake...
Now I need to make some for Sindy's Patisserie!
Happy Crafting!
Tools needed for this project:
Pen/pencil for tracing
Scissors
Tiny drill bit or a nail/or awl to poke through cover.
Materials needed:
Small plastic snack cups ($$ store)
plastic shot glasses---sold just about anywhere in party/liquor departments ($$store)
Double stick clear tape
Double stick foam tape
Scrapbook paper or self-adhesive vinyl
Doily or pattern for plate
1 pierced earring post and small back
1 bead cap
1 bead/pearl for handle
E-6000, Gorilla gel glue, or some glue good for plastic, metal and beads.
If you enjoyed this post(s), please join me by email- at
FOLLOW IT---upper right hand corner.
I have not been paid or reimbursed in anyway for my opinions or products shown, or from where I shop.
Please Join me at these Fine Blog Parties!
Thank you for your cooperation, Sandi
 |
| barbieoldnewgreenredo |
wow! such detail
ReplyDelete