BARBIEOLDNEWGREENREDO--JUST A GRANNY HAVING FUN WITH DOLLS< DIORAMAS STORIES AND DIY

BARBIEOLDNEWGREENREDO
Showing posts with label livingroom. Show all posts

Lighting Miscellaneous Doll Lamps and Updating an old lamp.


 Ad-Free Blog

Last post we worked on the ceiling lights. I had this adorable little lamp that came with a closet package for one of those doll companies not Mattel. 

barbieoldnewgreenredo

But honestly, they make all these adorable lamps but they don't light up. So I thought I would try.

barbieoldnewgreenredo

Like the last post, I'm going to use some mini lights with a mini switch from overseas. I'm using the 39" version of mini lights for this tiny lamp.

barbieoldnewgreenredo

First step with this one is to test the lights and then totally untwist them into a long string.

barbieoldnewgreenredo

I've taken the base off the lamp shade---it is hollow inside.

barbieoldnewgreenredo

I took some of the sticky foam tape and put two pieces around the shaft inside the shade. The idea is to hold the lights from springing out of the shade. I began with the end, and wound the entire @ 30" around the stem.

barbieoldnewgreenredo

You can see here own the wires lights are wound on the foam...worked very well.

barbieoldnewgreenredo

I left one light and the wire to the switch out. Then I put a piece of foam tape on the switch box to hide for turning the light on.

barbieoldnewgreenredo

A little foam tape on the bottom of the lamp and then I mounted the switch unto the side. It will be easy to reach, but out of sight.

barbieoldnewgreenredo

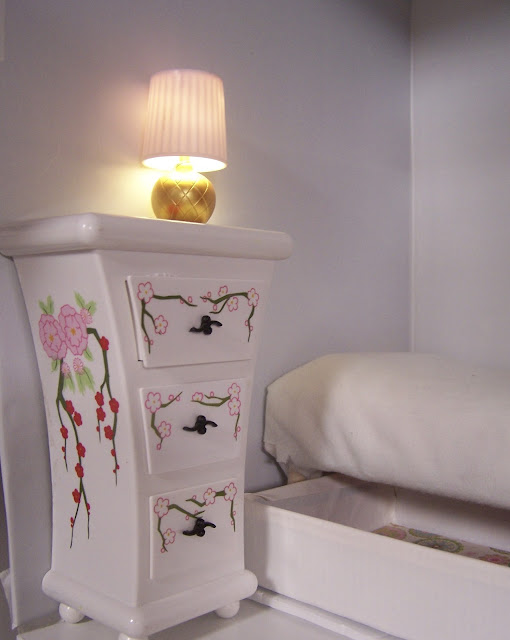
Barbara, your lamp is adorable on this chest! And I love the fabrics on the bed! 


barbieoldnewgreenredo

Today, after 10 months, I found my sewing box with all my threads, pins, and sewing machine supplies---so I can make the new bedding. This bed will have  a hidden drawer underneath for storage! 

barbieoldnewgreenredo

Now unto the gold lamp in the living room. 

I originally made some lamps a few years ago. Directions and the basics are on 

barbieoldnewgreenredo

Today is just an updated change which is more convenient than hiding a box with three batteries behind/under furniture! Upside the batteries in these are small and can easily be changed too, and you can move the lamps now from scene to scene if necessary.

barbieoldnewgreenredo

These are really simple, quick and easy for kids, too.

barbieoldnewgreenredo

Fun look---even better if it is lit.

barbieoldnewgreenredo


To light these up, I used the same technique as in the first one, only with the larger shades, you can leave the switch inside the shade! 

barbieoldnewgreenredo


barbieoldnewgreenredo

On a sheer shade you could double stick tape the switch and the wires onto the post of the lamp under the shade

Happy Lamp Making!!!

I'm not really advertising---BUT, I do have tips on ordering from many of the online stores with foreign merchandise. 

Temu is by far the fastest as they have most of their merchandise on/land here in the US.  I order things in larger quantities, because most of their costs are shipping when buying onesies.  I'm sure I will go through the dozens I have received quickly. And cost wise, the shipping was minimal on buying quantities. 

Downside---you may have to wait for foreign products to arrive. I ordered most of my seasonal merchandise and project stuff in August, when shipping times were less than a month. Just a tip for your shopping! 

Hope these ideas spur your on to make your own 

Light it UP with Lamps! 

If you enjoyed this post(s), please join me by email- at 
FOLLOW IT---upper right hand corner.

I have not been paid or reimbursed in anyway for my opinions or products shown, or from where I shop. 


Light Fixtures for a New BMR Living Room

Ad-Free Blog

After 10 months of moving, scraping, cleaning, sorting, selling, donating, scrabbling from the basement disaster  I am simply exhausted, I'm finally able to play in my doll room...in between trying to decorate, bake, and celebrate these winter Holidays.

My No.3-Barbara Millicent Roberts---senior (I treat her at her real age of 28+64 years...lol, birthed in 1959 as an 18 year old. Gosh that makes me feel old, too.


anyway, she finally has her own spaces...starting as a bedroom and living room.
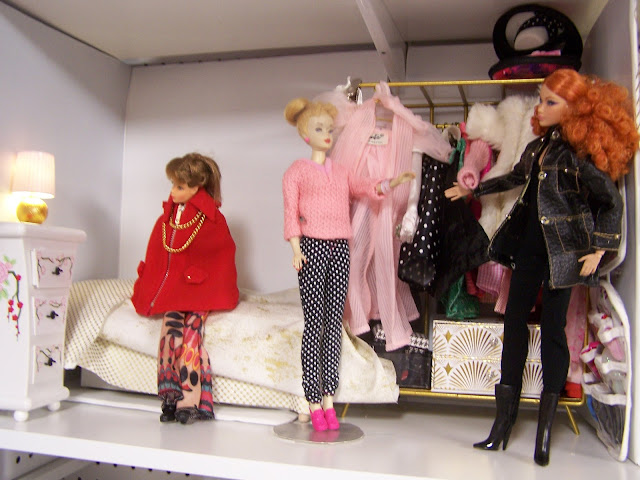
Making shelves into rooms is always a bit difficult, size wise and dealing with lighting. Here she is deciding on fabrics? with her friends.

barbieoldnewgreenredo

I found two of these crazy elaborate candle 'wraps' in a thrift store...just so fun and over the top, I thought they could be made into coffee tables.


barbieoldnewgreenredo

After I set up the room, though they were too much as tables, then the idea was wow, fabulous ceiling fixtures???? for lighting. One can always use a bit of BLING on the ceiling.

barbieoldnewgreenredo

Back in summer, I ordered a bunch of cheap mini-lights on Temu or Aliexpress...don't remember which.  They have really small switches. I ordered two lengths, 39" and 79" or so. After trying the short ones, I went for the longer for making the light fixtures bright.

barbieoldnewgreenredo

They are LED and very bright, I untwisted the bunch and loosened all the rings of lights.

barbieoldnewgreenredo

In my stashes of plastic pieces I had these containers (previously used as cake domes) from the dollar store. One of these fit perfectly inside the candle frame.
I put the lights inside the container and lidded it, the wire is so thin it easily fit over the edge even while the lid was on.

barbieoldnewgreenredo

Threading the switch through first....up through the top and over to the side. This will be glued to the ceiling, discreetly behind each light fixture.

barbieoldnewgreenredo

Wow, the plastic diffuses the light perfectly and is bright! 

barbieoldnewgreenredo

Back to the left is the roll of Dollar Tree double stick mounting tape I used. I put five pieces on---the frame and light is deceptively light. I have to stick this to white laminate shelving...so it should work. I also put one sticker on the switch to stick behind the light on the ceiling.

barbieoldnewgreenredo

I think these are really going to make the room. It was easy to switch the lights on and off. I've had problems with the magnetic lights with remote switches sticking up anywhere, so this is another option. We will see how long they stay up. 

Since BMR just got her room on Monday, she is slowly moving in, unpacking and making more plans for bedding! 

barbieoldnewgreenredo

I think this layout is flexible and pretty balanced. I've been saving that etagere on the left for five years, waiting to do her room/house. I need to add windows, ceiling trim, door frames--theoretically she is in the Penthouse of the Grand View(Hotel remodeled)

Next...see that cute lamp in the corner----more lighting ideas in the next post. Those mini-lights are too much fun to quit! 

HOW DO YOU LIGHT YOUR DOLL ROOMS/HOUSES!?!

If you enjoyed this post(s), please join me by email- at 
FOLLOW IT---upper right hand corner.

I have not been paid or reimbursed in anyway for my opinions or products shown, or from where I shop.