BARBIEOLDNEWGREENREDO--JUST A GRANNY HAVING FUN WITH DOLLS< DIORAMAS STORIES AND DIY

BARBIEOLDNEWGREENREDO

Vickie's Vintage:Fixtures and Vickie is Sleeping?

AD-Free- Blog

The other day---work was still being done on most of the shop. 

barbieoldnewgreenredo

Vickie found this great door at a thrift shop (it's a photo frame) and the scale is perfect.


barbieoldnewgreenredo

Painted one coat of silver over the red...left it blush. 

barbieoldnewgreenredo

Then I added some gel medium to some charcoal craft paint and painted then wiped it off and let it sit over night. The girl's put on the sticker letters and victorian flourishes. Vickie is cleaning the residuals off the glass. 

The closets are ready to set up.


Tutorial on painting plastic doll closets is here.DIY Doll Closets.

barbieoldnewgreenredo

Filled with color grouped clothes---The full skirts really eat up the floor space.
barbieoldnewgreenredo

Where the handles were are two raised screw recievers---I put a piece of bent coat hanger into the holes to display dresses on. Double stick tape holds shoes on small white cardboard, easier for moving around and not permanent.


barbieoldnewgreenredo

The first cabinet on the left ended up being all pink/maroon. Goodness, doll makers are heavy on pink. Mirror guy---is still slacking off. Maybe for the 

barbieoldnewgreenredo

Here are the benches cut from an existing deep nostalgia box frame.

barbieoldnewgreenredo

They are supposed to be for customers to sit, but seems, Vickie crashed and is taking a nap---sigh, what a slacker...lol.


barbieoldnewgreenredo

Two odd thrift store finds---the cabinet is enhanced with a 'fairy garden' fence, the body jewelry stand is perfect fashion doll size. So I can display clothes on it.

barbieoldnewgreenredo

Jewelry, hair accessories, mini purses fill the cabinet.

barbieoldnewgreenredo


The Jewelry stand has a few purses and a low profile wedding dress. Add some bling and it is fab!


barbieoldnewgreenredo

Another jewelry stand----white and everything.  

barbieoldnewgreenredo
Color coded and filled with fashions, purses and belts. Even room for some suitcases.

barbieoldnewgreenredo

Carly is busy cleaning the last of the construction dust. The cabinet behind her, holds swimsuits, underwear, and camisoles.
barbieoldnewgreenredo

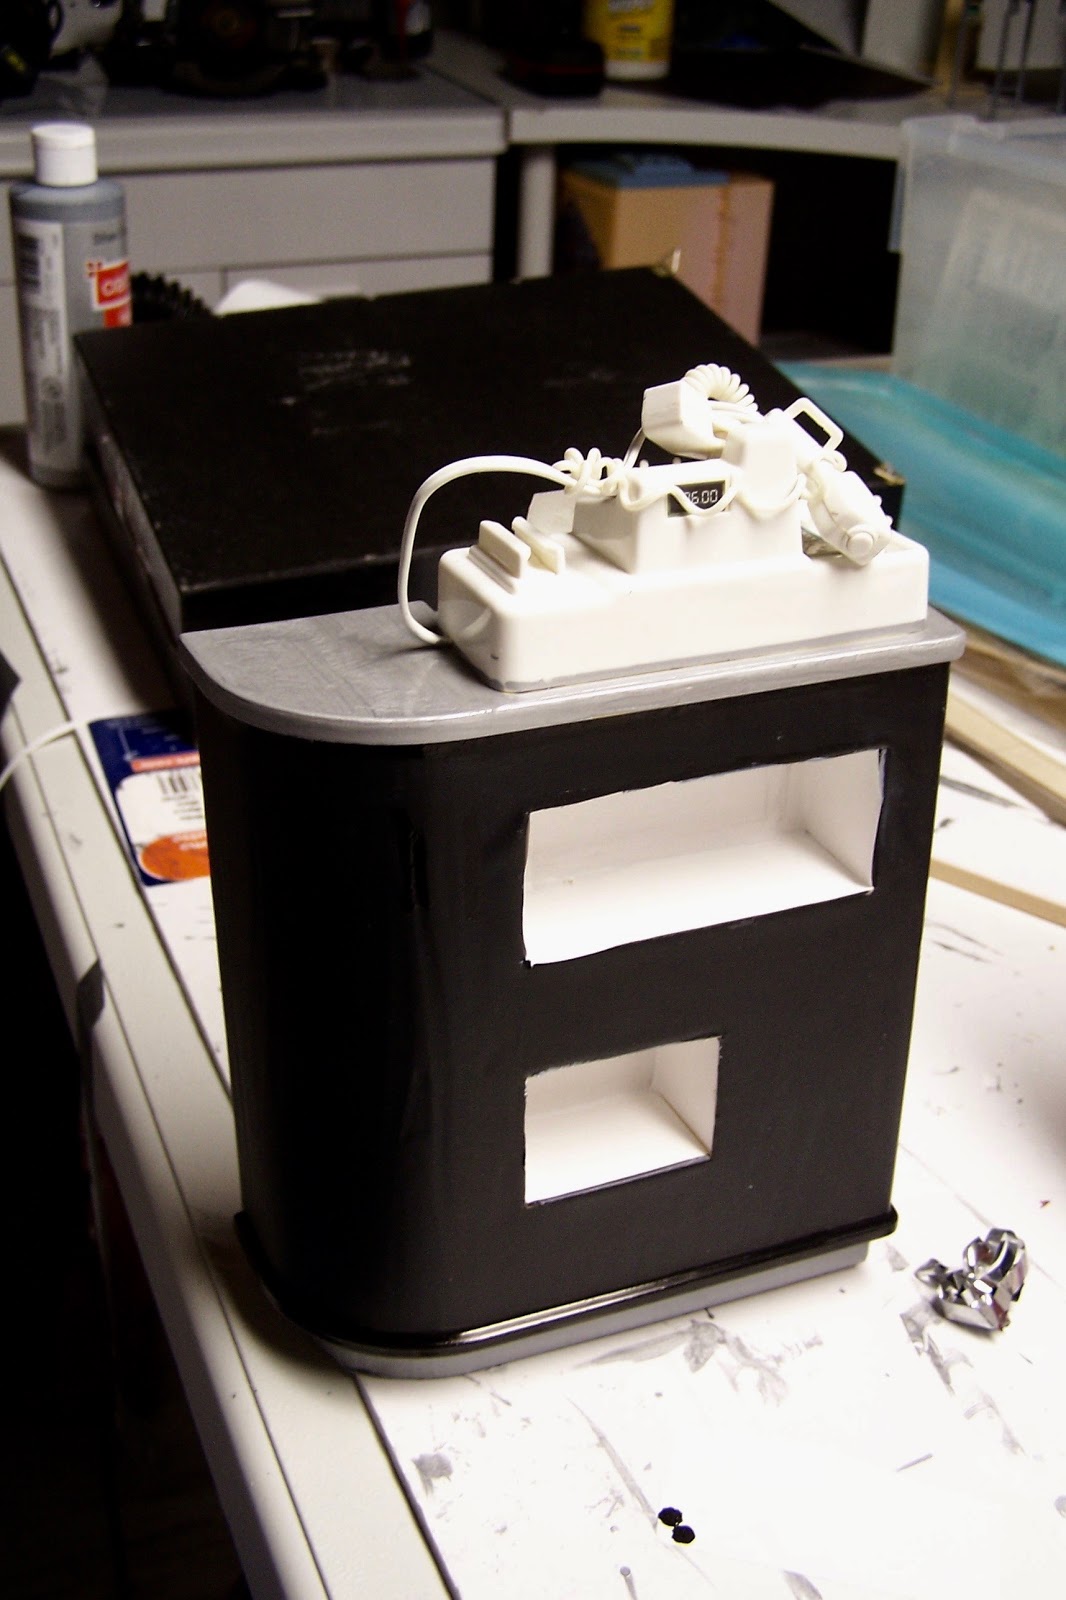
I freshened this up with some silver tape and paint, and some white stickum paper in the cubbies.

barbieoldnewgreenredo
It's electric, the cash register rings, the tag scanner works, and the charge card works. The Grand loves it. I didn't do anything on the back. ($1.99 was a steal)

barbieoldnewgreenredo
I explained a couple of times this was two shadow boxes with covers, I pulled off the covers and reset the hinges so the cubby parts are hooked together.

barbieoldnewgreenredo

Zoe straightens all the shoes and purses in here.

Undetermined Sound: Zzzzzzzzz-Zzzzzzzzzz-Zzzzzzzzz.
 
Zoe: What is that! (She looks around)
Zoe: Carly can you hear that sound?

barbieoldnewgreenredo

Zoe: Never mind, I think it is coming from upstairs! I'll check.


barbieoldnewgreenredo

Zoe: Vickie---it's time to wake up----we open in a couple of hours. 
Vickie: Uh, ....oh...? What time is it? 
Zoe: You had better go home and change! The Pre-Open Party is in a few hours.


barbieoldnewgreenredo

Vickie: Okay, ladies----hold the fort. The flowers still have to arrive and the mirror guy---I'm going home to take a shower----everything looks great and thank you, both.

Carly: Sure, please bring back coffee. We sure need some.

Vickie:Anything for my team. If Joe calls, tell him I'm on the way home.

All the opinions and photographs in this blog are my own. I have not been paid or reimbursed in anyway for my opinions, posts or any products shown or anywhere I shop.

Thanks always for visiting. 
I will try and respond to every comment and answer every question.

 Please do not use photos without linking back to this blog without my permission. 


Sharing at these Ad Free blog parties-with ads not in the middle of the blog.


Cooking and Crafting with JJ
Wonderful Wednesday
Talk of the Town
Vintage Charm


(I'm going to try and see if this is possible)
Thank you for your cooperation, Sandi Magle


Sandi


Girl Power!---Everyone works at the Shop

Ad-Free Blog

All the girls are at Vickie's Vintage working on the cabinetry. After hauling all the pieces upstairs, they take a quick breather.

(Left to Right---Carly-assistant manager, Richelle-designer, Lara-representing BMR enterprises-Barbieowner of building-Vickie shop owner-(behind-sweet Zoe staff) and Gilly-Zoe's friend and Zuumba instructor).

barbieoldnewgreenredo
Carly: Thanks gals, I never thought we could get all these pieces together. 
Richelle: Yes, thanks----Carly and Zoe did such a great job on all the painting. 
barbieoldnewgreenredo
Lara: I love the building, and the new paper is very nostalgic without being stuffy. I can't believe the ceilings in here. Who knew---this building had all this height.

barbieoldnewgreenredo
Vickie: I hope we have enough room for all the formal wear, I have  stockpiled.

barbieoldnewgreenredo
Richelle: Well, looking at the schedule, we still have the mirror, lighting, railings, lots of trim, front door, and all the fixtures to be installed, That's a lot for only a week, Vickie.
barbieoldnewgreenredo
And we sure can't let you open without railings.

Zoe:Gilly don't hang on the rod...please?

Gilly: Well, if the store doesn't make it, you could use this place for a workout center. (Gilly is one of those ---over the top Zuumba instructors).
baribieoldnewgreenredo
Carly: Oh, no...we wouldn't want to chip all this paint!
Vickie: Zoe and Gilly, why don't you take your energy downstairs and move the clothing fixture, please.

barbieoldnewgreenredo
Carly: Oh, this is scary going down. 
barbieoldnewgreenredo
Lara: That looks really big that way?
barbieoldnewgreenredo
Zoe: Come on Carly you can do it, just go down on your posterior.
(Leave it to the Canadian to put it nicely.)
barbieoldnewgreenredo
Richelle: Vickie, this might not work---turned this way?
barbieoldnewgreenredo
Gilly hops up on the repositioned rack. "Wow, this is great---. Are you going to carry new work-out wear?"
barbieoldnewgreenredo
"Wait until I dismount!"
barbieoldnewgreenredo
 Zoe: No, Gilly. Vickie's is for vintage clothes, no one wants used work-out clothing----ICK!
barbieoldnewgreenredo
Gilly: Sure, whatever. This place needs some thump-thump-thump music to get the energy up....! And, a JUICE BAR!

Zoe: Oooookay, let's go back to the apartment and have some refreshments, everyone. 

Vicky and Richelle stay behind for last minute plans.
barbieoldnewgreenredo
Vicky: So much to do...yet. I don't know, Richelle?
Richelle: I think you need food to think straight. I have to meet the electrician on the lights. Why don't you catch up with the girls and I will meet you later.
barbieoldnewgreenredo
Back at the apartment:
Vickie: I can't thank you all enough---this was real Girl Power!  But I need a margarita!
Zoe: I can't move my arms.

barbieoldnewgreenredo
Gilly: Vickie's definitely needs a Juice Bar.
Lara: Juice and vintage clothes don't really mix, Gilly. How about BMR enterprises picks up the tab though and we all go for Tacos and Margaritas...I'm starving!

All the opinions and photographs in this blog are my own. I have not been paid or reimbursed in anyway for my opinions, posts or any products shown or anywhere I shop.

Thanks always for visiting. 
I will try and respond to every comment and answer every question.

 Please do not use photos without linking back to this blog without my permission. 


Sharing at these Ad Free blog parties-with ads not in the middle of the blog (I'm going to try and see if this is possible)
Thank you for your cooperation, Sandi Magle

Share Your Cup

Sandi


DIY Doll Closets.

Ad-Free Blog
Mattel and other companies have issued so many closet carrying cases for fashion dolls, they now float around the thrift stores for pennies.
barbieoldnewgreenredo
  

I picked up 4 of these in perfect condition, minus a couple of shelves and a small door. They are still being sold new in stores for roughly $15-20. I suspect they are being purchased for their included fashions rather than the case itself. This is the one I didn't use, but sabotaged parts from.

I paid $1.99 to 3.99 for each of these. Really much easier than building all kinds of shelving for the new Vickie's Vintage Boutique.

barbieoldnewgreenredo

First thing was removing the stickers from the outside, and dismantling the doors and handles. The handles were a piece of cake only two easily reachable screws. 


barbieoldnewgreenredo

The doors were something else though. I have successfully removed lots of silver pegs from Mattel channels/hinges before. But, these would not budge. Normally a couple of taps with a hammer and screw driver and they begin to slide out---not these. After an hour---of trying on various sets of hinges--I declared a truce and grabbed my coping saw.  

Normally, I would use a Dremel tool saw, but this plastic was very flexible and soft---so it would gum up----as a high-speed tool would melt the plastic, rather than cut it. The coping saw made quick work of removing all the hinge tabs, though not as neatly as I would have liked. I used a file to clean the edges. The doors are all still intact---so, I may be able to use them for another project. And, nicely they are a full 12" tall and can be used for diorama doors!


barbieoldnewgreenredo
I fitted the cabinets in the unfinished room----and yes, they will work perfectly. Now, that PINK, ugh.
I had some serious issues removing the paper decals on the right sections of each cabinet, despite soaking the areas with alcohol. The rest came very clean. 
barbieoldnewgreenredo
                                     

I make it no secret, I really dislike pink. Not pink in general---but the continuous use of pink on items that would never be this PINK in Real Life, ie ---a pink stove??? However, there are lots of wonderful textures on the panels of these closets. After a thorough cleaning and wiping down every surface with alcohol, I removed all the shelves and doors. I decided the hanging bars will stay black---so there is no chance of the hangers scraping paint off them. I may eventually replace them with metal---we will see how they hold up.

barbieoldnewgreenredo

We finally had a moderate day---that was dry---to spray and paint- spray and spray. The three closets and shelves all took three coats of white satin spray---for plastic. I used a little over one can.

After spraying them all white, I covered the straight bar sides with shiny silver stickum from the scrap book section. I opted for a roll designed for those cutting machines that was on sale, instead of buying sheets. This is my first experience using adhesive backed plastic made for cutting machines. The quality is better than anything else I have used before.

barbieoldnewgreenredo

The girl's worked very hard on these cabinets....getting them installed with a little help.

barbieoldnewgreenredo

I left the little translucent shelves pink. A little pink goes a long way. The details on the drawer fronts were done with a store brand paint pen in silver. A perfect match for all the other silver. 
I have to figure out how to secure these two units together, might try some white plastic corner molding?


barbieoldnewgreenredo

The backs of the problem sections were covered with silver adhesive plastic, like the kind you use in scrapbooking cutting machines. I have smoothed out most of the bubbles since these pics. But, it was very easy to work with and didn't stretch like other products, and it was on sale. 
It does add a bit of bling.


barbieoldnewgreenredo

The shop is coming along. Vickie is wondering if she needs to use a different rack now, since the stairs has used up some floor space. We will see.

Supplies and Tools for this project:
Existing plastic doll closet(s) or carrying case(s).
Screw driver 
File
Hacksaw or coping saw to remove parts if desired.
Alcohol to clean all surfaces and remove any sticker residue
Spray paint for plastics -1 can almost did 3 units, front and back.
Paint pens- I used silver or desired color for details (and white for touch ups)
Scrapbook paper or metallic self stick paper for inside or doors if you choose.
Exacto knife--to cut paper or adhesive paper
Square and straight edge for cutting papers
Double stick tape if using scrapbook papers

All the opinions and photographs in this blog are my own. I have not been paid or reimbursed in anyway for my opinions, posts or any products shown or anywhere I shop.

Thanks always for visiting. 
I will try and respond to every comment and answer every question.

 Please do not use photos without linking back to this blog without my permission. 


Sharing at these Ad Free blog parties-with ads not in the middle of the blog (I'm going to try and see if this is possible)
Thank you for your cooperation, Sandi Magle

Share Your Cup
Share Your Style

Sandi


Vickie's Vintage Boutique: Diorama

Vickie's Vintage has been such a key element in my doll stories, I finally decided to have Vickie's built semi-permanent, with folding walls and floors secured by removable screws. I can fold it and store away. 

barbieoldnewgreenredo

These are simple hinges on the outside of the walls. The screws were glued and went through the plywood, and the points were then ground off smooth on the other side.

barbieoldnewgreenredo

Vickie's fictional street is on the near northside of Chicago. The HFIM house is on the same block, as is Vickie's apartment.

Since in theory---Vickie's building is now owned by BMR Corporation, and has acquired historical status on the near north side of Chicago---and restrictions have been put in place. The building being remodeled is from the 1880's, so plans must
restore existing or once existing spaces or features within the building compatible with its origins.

barbieoldnewgreenredo

Way back in June Vickie and Richelle worked on the plans for Vickie's Vintage remodel. To keep the story accurate, I worked within the same sizes as the original foam board Vickie's. We just theoretically went through the ceiling, into the upstairs apartment space which wasn't being used.


barbieoldnewgreenredo

Richelle presented a cardboard mockup---of the opened up ceiling and new second floor loft bridal boutique.
All said and done planning wise--it was Okay...but then construction had to begin.


barbieoldnewgreenredo

The worst thing is stairs for any diorama. This is pretty much why most temporary dioramas are one level. Mattel solves the problem-most of the time with chintzy elevators. (Except for the Grand Hotel--a rehab future project).

barbieoldnewgreenredo

The stairway was constructed by Hubby...from a paper pattern was made to fit the space.
I'm blessed with a husband who can build anything. I can also---however, just walking in his workshop is a hazard. After 50 years of marriage, we have found we work well together, as long as we are in different spaces, LOL.

barbieoldnewgreenredo

Fitting the stair stringers and held up to the foldable plywood walls that have been sealed. You can see the slight gap in the corner, where the hinges are showing. 
This should disappear in the painting and papering.


barbieoldnewgreenredo

The 1/4" plywood walls were sealed with a sanding sealer, and easily accepted wallpaper applied with spray adhesive. This should be easily removed, if any other type of wall treatment is desired.


barbieoldnewgreenredo

Edges are trimmed with an Exacto knife---following the edges of the walls.


barbieoldnewgreenredo

Cutting carefully---the cut will be in the corner and hidden.


barbieoldnewgreenredo

Here are the walls. The second floor is not as deep as the first floor. Next was 3 layers of silver paint to the lower part of the walls.
The plan is to set back the top floor about 4" to allow light into the lower floor. Often 1880's stores' second floors had overlooks into the open spaces below. 
  The walls were painted with three coats of acrylic craft paint in silver and ready to assemble.
barbieoldnewgreenredo

The molding we used was scrap----from other projects. We decided to use wing nuts and small screws. The top screw one affixes the second floor walls to the molding. The molding was glued and nailed to the wood second floor. The bottom screw attaches the floor tightly to the bottom walls. 


barbieoldnewgreenredo

You can see the screws and the floor installed under the second floor walls. This will be painted out or trimmed, so you won't see it.

barbieoldnewgreenredo

Screwing (wing nut) the top of the stairs through the second floor had them floating above the landing. I loosened the wing nut a couple of turns and it dropped into place. I will use velcro to adhere the landing to the wall. (making it all removable)

barbieoldnewgreenredo

Everything is tightly assembled and the girls can't resist seeing if the old fixture will work---Hmmmm?


barbieoldnewgreenredo

Here we can see the silver stairs and walls installed and painted. Currently I'm using dull silver poster board on the floor. It really looks like concrete and photographs well, without shine or glare.

Vickie and Richelle review the materials still needed to be delivered and installed.

 Vickie: We need lighting, railings, clear glass railings for second floor, moldings and trims and the large mirror for the center of the second floor. Plus, all the clothes and fixtures ready. That's a lot of things we have to do---for next week's opening???
(to be continued) 

Tools needed.

Power saw or you could have these pieces cut at the lumberyard. 
Band saw for the stairs---you could do these with a hack saw, or a coping saw.
Miter box for cutting angles on moldings.
Hammer (small)
Drill for holes
Screwdriver for hinges and bolts.
Paint brush

Materials needed for this project so far:

1/4" plywood 2-14"x15", 2-15"x30", 2-15"x20"

1/2" plywood 14"x31" for second floor 
1/2" plywood 20"x31" for first floor

1/8" pine (3'x6"or so) for the stairway. We have a sheet of this always around for mini-projects.

Cut and assemble walls before cutting moldings to fit.
6 feet of 2" wide moldings for securing the base and second floor  
6 feet of 1" wide moldings for the base and the first floor.

Nails for moldings to floors.
8 hinges and screws
7 sets of screws and wing nuts for securing this together.

Wood glue (for moldings) and stair treads.
Wood putty--to fill in irregularities on stairs and elsewhere
Spray glue
Sanding sealer
Paint-silver/storebrand acrylic craft paint. (3 coats on everything)

13-12x12 sheets of scrapbook paper for walls.
2 placemats for the upstairs carpet
1 piece of poster board for first floor
Silver duct tape

(To be continued)
Another post will show railings/trims and finishing. 

All the opinions and photographs in this blog are my own. I have not been paid or reimbursed in anyway for my opinions, posts or any products shown or anywhere I shop.

Thanks always for visiting. 
I will try and respond to every comment and answer every question.

 Please do not use photos without linking back to this blog without my permission. 

Sharing at these Ad Free blog parties-with ads not in the middle of the blog (I'm going to try and see if this is possible)


Pink Saturday

Share Your Cup

Thank you for your cooperation, Sandi Magle
Sandi