BARBIEOLDNEWGREENREDO--JUST A GRANNY HAVING FUN WITH DOLLS< DIORAMAS STORIES AND DIY

BARBIEOLDNEWGREENREDO
Showing posts with label 1:6 dollhouse. Show all posts

What's New for the New Year 2024 with Ryan and Richelle.

Ad-Free Blog

We are at Ryan and Richelle's new digs, and they have an interesting discussion with Midge and Alan.

Midge: Wow, I sure love all the space you have here. How did you ever find this place?
barbieoldnewgreenredo

Ryan: It was my cousins, and he sold it to me to avoid re-doing stuff and to save on the realtor fees. It was a family exchange sort of. We Saved a lot of money, and it's still in the neighborhood we are familiar with. It really is big for us right now. Actually that is why we asked you here.

barbieoldnewgreenredo

Alan: Yes, we have been looking for something affordable for quite awhile. What do you have in mind?

barbieoldnewgreenredo

Richelle: Well, we thought you might want to rent part of the house and share this floor with us.
barbieoldnewgreenredo

Midge: I've been living out of a suitcase at my aunts, and Alan's lease is up in the New Year and it's increased with extra HOA fees and astronomical if he stays.

barbieoldnewgreenredo

Ryan: Well, if you might be interested, we can take a quick tour! Let's start upstairs.

barbieoldnewgreenredo

Richelle: We haven't done a thing in the house yet, my taste isn't pink, but we may have to just deal with it, here in our bedroom.  I want to make a work station up here, and change the dresser out for a real closet.

barbieoldnewgreenredo

We do have Ryan's mom's pooch. Mortimer is really old, and sleeps a lot. He only appears at meal time, so be forewarned.

barbieoldnewgreenredo

Richelle: The upstairs bathroom is huge. You would be able to use the tub, but there is a full size bathroom with shower downstairs level.

barbieoldnewgreenredo

Richelle: The main floor has this living/dining room and table for four for meals.

barbieoldnewgreenredo

I'm moving this to create a work space upstairs, mostly because the light isn't great and it would be in the line of traffic.
barbieoldnewgreenredo

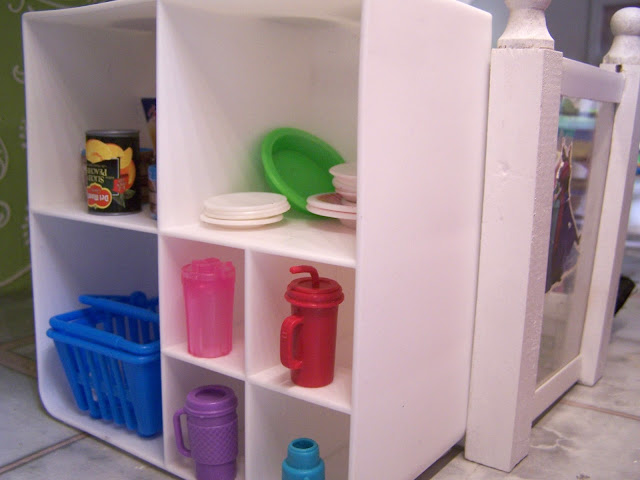
Richelle: The kitchen is really quite complete. 

Midge: Great appliances and I love all the shelves.

barbieoldnewgreenredo

Richelle: The fridge is huge, and there is plenty of storage. We could figure out some sort of system for cooking. Carry-out is so expensive now, and of course we are trying to cut expenses since we have this house.
barbieoldnewgreenredo

This is the current island, which I may move to the center for traffic flow. We will see how it works.

Midge: The stairway goes down to the rooms we would have?

Ryan: Yes, and the garage is down on this level.
barbieoldnewgreenredo

Richelle: Here's the garage.
barbieoldnewgreenredo

Ryan: Yep...and we have it already full of 'stuff'. Let's check out the main room.

barbieoldnewgreenredo

The basement was basically a man-cave. We brought our bed from the HFIM house...and it has great storage drawers underneath. There is plenty of room under the stairway for a closet. The wall bookcase is really anchored so it have to work around it. I had a desk under there, but the bed had to go somewhere.

barbieoldnewgreenredo

Ryan: Here's a couple of old snapshots from before we bought the house. 

barbieolldnewgreenredo

It's really a flexible space!

barbieoldnewgreenredo

Here's the space for storage under the stairs.

barbieoldnewgreenredo

But, there's this great closet by the bathroom.

Midge: Anything is better than living out of a suitcase.

barbieoldnewgreenredo

Ryan: The bathroom is great and the shower is the best, that's one thing we are going to add upstairs. 

Alan: Looks great and plenty of light down here too.

Richelle: I think it might be a good idea for you both. So what do you two think? Would you like to make this a duplex for awhile, and as long as you want?

Alan: I sure do, Midge what do you think?

Midge: As long as I can take a bath once in awhile, even though showers are fine. And, I love to cook, so I'd be happy to take that on.

barbieoldnewgreenredo

The DIY dollhouse circa 2015

Ryan: Let's work out a simple contract and you can both move in, whenever! 

SO
Welcome HOME to Ryan, Richelle, Midge and Alan's place.

 Wonder what they will do 
in the New Year?

If you enjoyed this post(s), please join me by email- at 
FOLLOW IT---upper right hand corner.

I have not been paid or reimbursed in anyway for my opinions or products shown, or from where I shop. 

Please Join me at these Fine Blog Parties!


Townhouse Remodel Lighting and Appliances

Ad-Free Blog

Barbie OLDNEWGREENREDO

barbieoldnewgreenredo


Hi, Dear readers. The point of these remodels was to add permanent lighting, add space and eradicate the Mattel color schemes. In other words, make it 

as REAL LIFE as possible.

I gave the kitchen appliances two more coats of gray multi-surface acrylic paint, and I added some contact paper counters. I also painted the window frames on the first floor gray over the sprayed beige from the first painting. It took three coats of multi-surface gray acrylic. UGH! Mostly because of all the crevices and my shaky hands.

You can see the temporary walls set in...to give some idea of the new space.  I am still pondering adding some floor area to the second floor. The cut for that would be intricate, I will have to see if it warms up enough for Hubby to rough cut that for me outside. Our temps are going very cold again.

barbieoldnewgreenredo

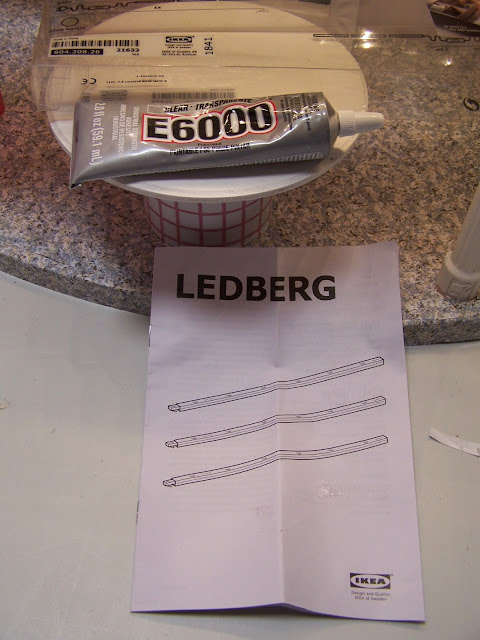
While the house was on the center worktable,  I started with the lights. Because of the gridded ceilings, there is no long length to sink lights into.  The lighting I chose are LEDBERG bar lighting from IKEA. I had to think about it for a long time, then dug in my my wood scraps. 

barbieoldnewgreenredo

I buy assorted bags of small wood pieces when I see them on sale and found a few that were the exact width/depth of the grid holes. I cut  6 small length wood bars that would fit inside the ceiling grids. Then I screwed the mounting clips on that come with the light fixture.

barbieoldnewgreenredo

The LEDBERG lights are very flexible, you can clip 1, 2 or 3 together in a straight line. The kit includes one cord with switch and one end to plug into the lights. If you want to split the three bars up---you will need to purchase one or more cord(s). 

barbieoldnewgreenredo

I planned on two bars on the downstairs, and one upstairs with room to add another if I needed to.

barbieoldnewgreenredo

The cut wood bars with the clips were then glued (town house laid down on the table) on the ceiling side of the bar and on one side of the grid (walls). I used E6000 which is pretty good on any surface and left it sit for 24 hours. 

I had an extra cord left over from doing the Grand Hotel, so I could put the last bar on the second floor. 

barbieoldnewgreenredo

I turned all the lights off in the shop---and tested the lights.

If you are going to do this for kids---nothing is exposed in these plastic bars, and the cords can be encased and totally put behind a house to the wall. 

Our grand's house (she got when she was 3) had lights on three floors and were totally encased and cords buried in plastic casings through the back of the house. Switches can also be placed out of reach, but of course it is up to the parent to decide if they want electrical lights in a child's house.

barbieoldnewgreenredo

After installation in my totally dark work room.

It looks like this will be more than enough light for the house. YAY!*! I can always add another bar to the second floor if I decide I need it.

No more batteries and no more banging the doll's heads on the Christmas lights. Batteries are great for accent lighting, but for room lighting very expensive to keep going through batteries, and not great for the planet either. These new LED lights use so little power---only 2 watts. 

A great REDO and GREEN too!

barbieoldnewgreenredo

Next project....

So, I needed some realistic knobs on the kitchen appliances, as well as the new contact paper counters which look like 'quartz'. 

Since we have a pandemic, I'm literally not going out and only using what I have around the house. A left over roll of $Store contact/shelf paper, I did both the floors (kitchen and the extension, and the counters, a small chunk on the wall behind the stove, and literally have half a square foot left of small pieces.

 I still need to add a microwave here, too. A little extra glue helps hold down the edges of the contact paper on the countertop and around the stove parts.


barbieoldnewgreenredo

This is my idea for the easy knobs. First I drilled tiny holes through the plastic appliances in the kitchen with my Dremel drill.

With a wire cutter I clip plastic pushpins in half. If you go very low on the middle, you hit the thick pin. 

barbieoldnewgreenredo

This isn't exact, so I just sand them down to match. Usually with rough, then fine sandpaper. My shop is such a disaster I couldn't find the fine paper. Since I'm doing black paint it really didn't matter.

barbieoldnewgreenredo

I stuck the pins in some foam core and painted them with a paint pen and let them dry.  A healthy drop of glue (E6000) on the pin, and then just push them through the holes in the appliances.

barbieoldnewgreenredo

The little bar buttons on the dishwasher are actually from Barbie fashion cardboard (remember the black and white stripes) cut oh, so tiny.  I used a silver Sharpie to color the white squares and Wha-La push buttons.  The silver is metal foil tape I use on the front of my appliances. After I did these photos, I did more touch up---it helps to blow up photos to see what you missed!

barbieoldnewgreenredo

After touching up the stove top and the sink, I blackened some trim. (needs another coat, and the faucets on the sink.) I plan on adding some gray trim to the windows after I do the builtins to the left of the cabinet run! Dolls need Storage, so  shelves and more cabinets will be made for this kitchen!

I'm not sure what's next, as I have moved the house back in place, still pondering a floor extension on the second floor. Not one bed I have can go on that floor that is too short, and you can't block the elevator or the fireplace and let's face it, you need a minimum of two bedrooms in any house!!!

To Extend or not to Extend, that is the question...
NO...actually HOW is the question?

If you enjoyed this post(s), please join me by email- at 
FOLLOW IT---upper right hand corner.

I have not been paid or reimbursed in anyway for my opinions or products shown, or from where I shop. 


An Empty Townhouse, Planning, Walls, Painting!

AD-FREE BLOG

Yikes, I took everyone and everything out of the  townhouse side of the HFIM House. And pondered, and pondered and pondered.

barbieoldnewgreenredo
The storyline will be---that two houses/remodeled were worth more to the residents/investors. The Chicago market has been hot throughout the pandemic. 
BMR Ltd.  Barbara Millicent Roberts-my no.3's company bought the two  properties and began the separation.

barbieoldnewgreenredo

I picked my nose for two days trying to figure out the new configurations and how to do the 'remodels'! What would new families/residents want in a higher end town house. Meanwhile the craft room was in upheaval.

barbieoldnewgreenredo

I thought I was organized, but my thrift store stashes have gotten out of control. I have 8 totes of furniture, and lots of bits here and there on shelves.

barbieoldnewgreenredo

I pulled out all kinds of furnishings to see what I had that would work in the potentially newly remodeled homes.

barbieoldnewgreenredo

The HFIM guys (7) have moved into the basement apartments for the time being. Belle and Mulan are still living upstairs in the Victorian Mansion. Everyone else is scattered.

barbieoldnewgreenredo

 It really has become fruit basket upset. I couldn't help adding another bunkbed to the 4 girl's duo townhouses to give them two bedrooms(adding a wall) and I 'll eventually add some bathroom walls too, for privacy. Meanwhile there is an extra gal on the sofa. (So that is five gals here).

barbieoldnewgreenredo

One thing was obvious---I have more than enough furnishings to do 10 more dioramas.

barbieoldnewgreenredo

The biggest issue still is...the floors in the townhouse are too shallow for any kind of furniture arrangements. Do I expand the floors out, or just try and work with it as is?

barbieoldnewgreenredo

I decided to definitely add to the ground floor living space, extending the floor about 7" out to match the depth of the Victorian Mansion. This will leave walk space on the open side of all the homes. My imagination says they are all on one crowded block in Chicago, north of the Loop.

barbieoldnewgreenredo

I used an old piece of thick foam core. I actually remembered to notch room for the elevator line.

barbieoldnewgreenredo

The old foam core had (tiles on one side, concrete on the other that gotten raggy.) Thick foam core is running about $7 a sheet now, so I reuse, reuse, reuse.

I ripped off the old papers and had pristine thick foam core.  The thickness wasn't quite enough so I added another layer of $ store foam core on the bottom.

barbieoldnewgreenredo

I also gave the magenta kitchen cabinets a prime coat of brush on multi-surface acrylic after a thorough cleaning with alcohol. OMG..what a difference. I'll finish a second coat tomorrow and silver handles on the appliances, then a sealer. I like the gray---it is neutral and not six layers of white to cover the magenta...LOL!

I ripped off all the wall paper and the pink/white tile flooring(contact paper). I 'drywalled' the walls in white contact paper. It will be easy for new residents to change it to their tastes with wallpapers. (double stick taped papers are easily removable from the contact paper).
There's still a pink tint...I wish I had time to do this in summer so I could spray multi layers of paint. Honestly that ghastly pink is potent!

barbieoldnewgreenredo

Here I have put up some scrap foam core on the sides for the walls, just to see how it will finish off! The center window on the bottom screams for built-ins, which will take some time. First new walls, and deciding on the flooring application. I plan on redoing the elevator---in spring when I can spray it, that will involve restringing it---cross your fingers, I may paper it now, or cover it up...I really don't like that pink!

barbieoldnewgreenredo

I 'drywalled' the second floor room also. The bathroom is fine as it is. I am debating on the flooring or to work with it. There are a few touchups needed here and there of the white!


barbieoldnewgreenredo

The third floor got the same treatment, although the walls on the right were temporary, I finished them off to match. I don't have to add lighting to this floor as it is so close to the ceiling lights in the shop. I plan on painting the windows and adding moldings to the square ones.

PS (Because the walls on the right aren't permanent, I can easily add the original patio/pool and light posts at anytime) Patio pools aren't really cost effective in cold Chicago. Did you ever notice that Barbie apparently lives ONLY in warm climates????)

barbieoldnewgreenredo

So three days in, this is what I got accomplished. A good start!

barbieoldnewgreenredo

And, here is the IKEA LEDBERG lighting which was the reason I started this to begin with! (No more Batteries!)

Lighting and flooring, more painting in next post!

WHAT'S YOUR LATEST REMODEL PROJECT?

If you enjoyed this post(s), please join me by email- at 
FOLLOW IT---upper right hand corner.

I have not been paid or reimbursed in anyway for my opinions or products shown, or from where I shop.