Ad-Free Blog
Barbie OLDNEWGREENREDO
Hi, Dear readers. The point of these remodels was to add permanent lighting, add space and eradicate the Mattel color schemes. In other words, make it
as REAL LIFE as possible.
I gave the kitchen appliances two more coats of gray multi-surface acrylic paint, and I added some contact paper counters. I also painted the window frames on the first floor gray over the sprayed beige from the first painting. It took three coats of multi-surface gray acrylic. UGH! Mostly because of all the crevices and my shaky hands.
You can see the temporary walls set in...to give some idea of the new space. I am still pondering adding some floor area to the second floor. The cut for that would be intricate, I will have to see if it warms up enough for Hubby to rough cut that for me outside. Our temps are going very cold again.
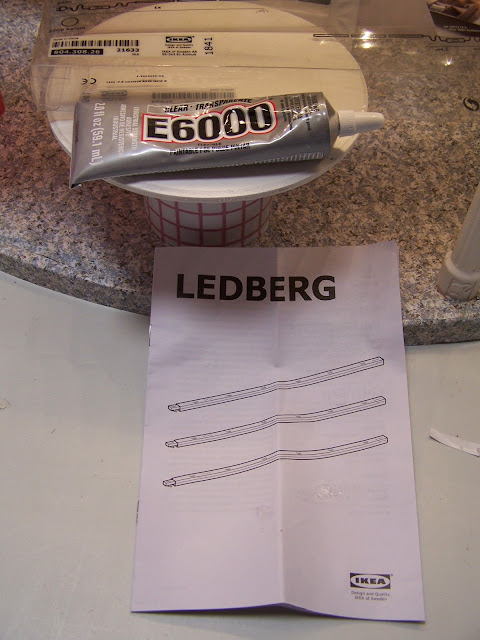
While the house was on the center worktable, I started with the lights. Because of the gridded ceilings, there is no long length to sink lights into. The lighting I chose are LEDBERG bar lighting from IKEA. I had to think about it for a long time, then dug in my my wood scraps.
I buy assorted bags of small wood pieces when I see them on sale and found a few that were the exact width/depth of the grid holes. I cut 6 small length wood bars that would fit inside the ceiling grids. Then I screwed the mounting clips on that come with the light fixture.
The LEDBERG lights are very flexible, you can clip 1, 2 or 3 together in a straight line. The kit includes one cord with switch and one end to plug into the lights. If you want to split the three bars up---you will need to purchase one or more cord(s).
I planned on two bars on the downstairs, and one upstairs with room to add another if I needed to.
The cut wood bars with the clips were then glued (town house laid down on the table) on the ceiling side of the bar and on one side of the grid (walls). I used E6000 which is pretty good on any surface and left it sit for 24 hours.
I had an extra cord left over from doing the Grand Hotel, so I could put the last bar on the second floor.
I turned all the lights off in the shop---and tested the lights.
If you are going to do this for kids---nothing is exposed in these plastic bars, and the cords can be encased and totally put behind a house to the wall.
Our grand's house (she got when she was 3) had lights on three floors and were totally encased and cords buried in plastic casings through the back of the house. Switches can also be placed out of reach, but of course it is up to the parent to decide if they want electrical lights in a child's house.
After installation in my totally dark work room.
It looks like this will be more than enough light for the house. YAY!*! I can always add another bar to the second floor if I decide I need it.
No more batteries and no more banging the doll's heads on the Christmas lights. Batteries are great for accent lighting, but for room lighting very expensive to keep going through batteries, and not great for the planet either. These new LED lights use so little power---only 2 watts.
A great REDO and GREEN too!
Next project....
So, I needed some realistic knobs on the kitchen appliances, as well as the new contact paper counters which look like 'quartz'.
Since we have a pandemic, I'm literally not going out and only using what I have around the house. A left over roll of $Store contact/shelf paper, I did both the floors (kitchen and the extension, and the counters, a small chunk on the wall behind the stove, and literally have half a square foot left of small pieces.
I still need to add a microwave here, too. A little extra glue helps hold down the edges of the contact paper on the countertop and around the stove parts.
This is my idea for the easy knobs. First I drilled tiny holes through the plastic appliances in the kitchen with my Dremel drill.
With a wire cutter I clip plastic pushpins in half. If you go very low on the middle, you hit the thick pin.
This isn't exact, so I just sand them down to match. Usually with rough, then fine sandpaper. My shop is such a disaster I couldn't find the fine paper. Since I'm doing black paint it really didn't matter.
I stuck the pins in some foam core and painted them with a paint pen and let them dry. A healthy drop of glue (E6000) on the pin, and then just push them through the holes in the appliances.
The little bar buttons on the dishwasher are actually from Barbie fashion cardboard (remember the black and white stripes) cut oh, so tiny. I used a silver Sharpie to color the white squares and Wha-La push buttons. The silver is metal foil tape I use on the front of my appliances. After I did these photos, I did more touch up---it helps to blow up photos to see what you missed!
After touching up the stove top and the sink, I blackened some trim. (needs another coat, and the faucets on the sink.) I plan on adding some gray trim to the windows after I do the builtins to the left of the cabinet run! Dolls need Storage, so shelves and more cabinets will be made for this kitchen!
I'm not sure what's next, as I have moved the house back in place, still pondering a floor extension on the second floor. Not one bed I have can go on that floor that is too short, and you can't block the elevator or the fireplace and let's face it, you need a minimum of two bedrooms in any house!!!
To Extend or not to Extend, that is the question...
NO...actually HOW is the question?
If you enjoyed this post(s), please join me by email- at
FOLLOW IT---upper right hand corner.
I have not been paid or reimbursed in anyway for my opinions or products shown, or from where I shop.
Please Join me at these Fine Blog Parties!
Thank you for your cooperation, Sandi