BARBIEOLDNEWGREENREDO--JUST A GRANNY HAVING FUN WITH DOLLS< DIORAMAS STORIES AND DIY

BARBIEOLDNEWGREENREDO

Grand View (Grand Hotel) Lighting Upgrade

Ad-Free Blog

Hi, I'm sure you have enjoyed all the photos of Jacquie's Salon, the lobby and Sindy's Patisserie in the ground floor of the Grand View (Mattel rehabbed Grand Hotel). Well part of all that ambiance was lighting. I thought going battery power would be cheaper than electric lighting. NOT SO! 

barbieoldnewgreenredo

Here are all the lights I had in the ceiling. Those great press lights that hook up with magnets to the ceiling(sometimes)...totally eat batteries. I had hedged at spending $40-ish dollars for plug in permanent lighting. Thinking that temp or battery would be sufficient to do the 5 foot by 20" grand hotel. Lots of light comes down the atrium lobby, but all this wasn't really enough, especially when I had to turn on 8 switches each time and turn them off again when done. The homemade hanging lamps are still great, but I may choose to change those also.

barbieoldnewgreenredo

Here is the Hotel emptied and the walls pulled off (I use velcro to attach them) and open when I need to take photos or work inside.

barbieoldnewgreenredo

I had bought this LED light tape with clips---that actually changed colors after Christmas. The directions said you could make 1" diameter turns? and apply with the sticky backing.

barbieoldnewgreenredo

Here's the tape...a nice bright light---16 feet, but...turning corners when lying flat wasn't possible even a 30 degree turn wasn't possible, it kinked horrible. And, someone had stolen all the clips from the box, and the sticky back stuff didn't work at all, 
despite a smooth clean surface.
I totally canned that solution. I can use them somewhere else outside! 


barbieoldnewgreenredo

Here I am trying to figure out if I could mount it to the sides. Totally not workable.
There are lots of flexible strips on the market---for me---this did not work at all. It is flexible around things, but lying flat not! 

barbieoldnewgreenredo

I dismantled the hotel central pillars and removed the rest of the jointed second floor. Normally I like to leave as much of an original structure as possible. But I hacked and sawed all the rest of the second floor off, just leaving the small strips of original  floors attached to the front to place the fitted wood floor over. Support wise, I don't need any pillars, they were just decorative.

barbieoldnewgreenredo

We had used a larger set of  IKEA lighting for the Grand's dollhouse here:
It had been very successful and is still working 5 1/2 years later.

It was 4 weeks before I got to IKEA, they don't ship lighting except with like an entire kitchen order, and covid kept me away from making the trek. I bought three sets of 3pc. Ledberg lighting. Which is in 11" straight pieces in that you can use 1, 2, or 3 pieces together. Nice thing is there are no exposed parts and they have screw in clips which are very secure. There are several different types of cabinet lighting sets, choose what works best for you.

barbieoldnewgreenredo

Here is a closeup of the clips. Easy to pull out also.

barbieoldnewgreenredo

Lots of cord between fixtures...and switches. 

barbieoldnewgreenredo
The atrium hole is in the back center. I have always planned on finishing molding around the atrium hole, and that will be next.

barbieoldnewgreenredo

Removing the pillar block supports was pretty easy I just twisted them off and then tipped over the whole structure and removed the screws.

barbieoldnewgreenredo

Here you can see the plastic floor supports along the front wall where the floor is fitted over.

barbieoldnewgreenredo

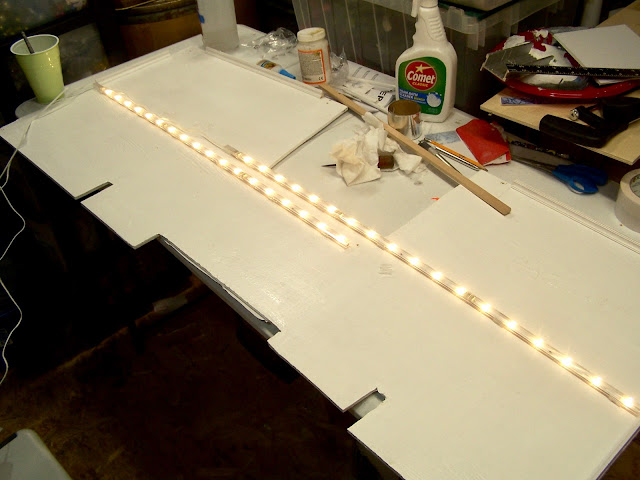
I had to test the lighting. I think this works well. Not too bright! but definitely fills the space. PS---the lighting for this floor cost about $30.00...less than 4 years ago. 

barbieoldnewgreenredo

Here's from the other end---that's a lot of tile...luckily I saved a couple of sheets from the doing the orginal floors.


barbieoldnewgreenredo

The color had mellowed a bit since they were applied.

barbieoldnewgreenredo

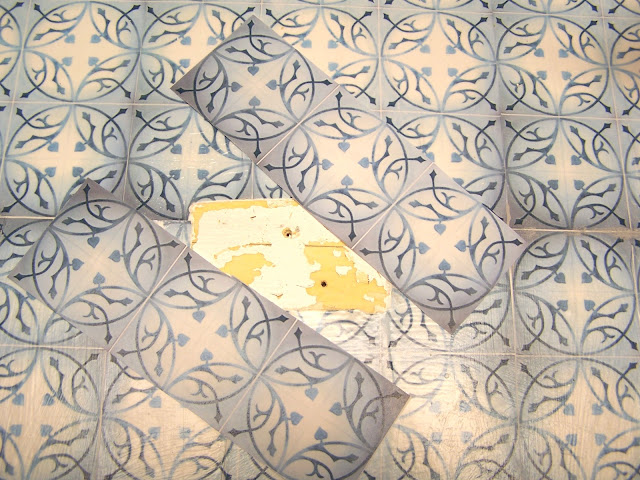
I fitted like six tile images over the holes which I cleaned and wiped with alcohol. Good old modg-podge, wrinkled but then shrunk out when dried.


barbieoldnewgreenredo

You can see a slight variance in color---but a coating of sealer will add just a bit of yellowing to make it match exactly.

I'm so glad to have this done, and when the hotel is put back together it will be great. I have some moldings to change. I really need the room in the workroom right now, so it will be packed a way for a month or so, so I can catch up with other projects.

LIKE OPENING 
MY NEW ETSY SHOP
Devoted to DOLLS AND TOYS! 
Stay tuned! 

What sort of lighting 
do you use for your dolls? 

PS. I am not advertising the products I use, I simply state a name brand because I actually like and use the product. I have not received any payment, gratuity, or product for using the products shown.


Thanks for viewing and feel free to ask me any questions or inquiries, and I will get back to you. 


Woot! Doll Vintage finds and 2 new guys!

Ad-Free Blog
Hi, there! I finally hit a couple of thrift stores in a new area and found lots of goodies, plus my friend just moved, and little stashes she found over the last year reappeared. Bonanza!

barbieoldnewgreenredo

The smalls here are from her---never turn down dishes, glasses, and love the andirons. The Blue chair will get used somewhere, but I will add legs below cause they are just too low!

barbieoldnewgreenredo

I bought some goodie bags of clothes---and these Kelly and Tommy, which is a plus. 

barbieoldnewgreenredo
One of the bags had this little box of very vintage baby items. Everything looks to be mattel, I think. Love the school ox and composition book that opens.


barbieoldnewgreenredo

A few kitchen items, which I appreciate, as I will have so many kitchens eventually and my gang does like to eat...strange box of fries? 


barbieoldnewgreenredo

A rabbit hutch? and a vintage doll bed for Foofie or the other mutts in the HFIM house.

barbieoldnewgreenredo

A sweet doily, etc...and the etch-sketch works...!

barbieoldnewgreenredo

I have been on a clothes drought. I bought five bags, and wow...there are some pieces in here. Only a few were a bit soiled. Couple things need new snaps, easy fix.

barbieoldnewgreenredo

With so many dolls in stories, I need many changes, lots of everyday clothes.

barbieoldnewgreenredo

Ken suit--always appreciated, drum major costume, a few pants and a bunch of skater outfits??? Pleathor pants that are starting to melt...though they look good.

barbieoldnewgreenredo

I'm actually happy with the everyday clothes there were 5 white tops of various styles, which will help! A few Fashion Fever and Fashion Avenue pieces in here, I wish I had bought all the bags now.

barbieoldnewgreenredo

Also found the PERFECT wicker pieces, with no cushions, but easy fix.
I ordered two articulated dolls, the new Jack the Lamplighter (Lin-Manuel Miranda) who is absolutely adorable. He has so much character and I love his smile, clothes and shoes. He seems to be a bit slighter...I won't know until I get his outfit off.

barbieoldnewgreenredo

and a wheel chair Ken to replace the play-line basic blonde Ken that I made the mannikin from. He is a bit different...just looks like he has been on vacation and a has some more hair-so he will be Kevin in the HFIM house and is welcomed.
The single chair is missing it's ottoman, but who knows that piece may show up some day! The articulated KEN drought might be over, he is a bit tan, so I will match his body to heads and maybe order a few more and then have a wheel chair sale.


Clearly the BMR59 Pony tail guy's body matches no one. I do like him with a hair cut!

barbieoldnewgreenredo

Nor does this gal. Although she is growing on me, now. 

What goodies have you found or ordered???

Thanks for viewing and feel free to ask me any questions or inquiries, and I will get back to you. 


Diorama: Sindy's Commercial Bakery Kitchen Part 1

Ad-Free Blog
Making a Commercial Bakery Kitchen

Planning a commercial bakery kitchen is really no easy task. I do have an entire tote full of castoff thrift store kitchen appliances and furniture. I bought a Barbie house full of furniture in 2018. And here is two of the great pieces, plus all the excellent accessories. A little oversized, it hasn't worked for any other project so far. 

barbieoldnewgreenredo

Here it is in all its 1990 Mattel PINK glory, and ...

barbieoldnewgreenredo

the matching kitchen cabinet with sink and dishwasher. Luckily the dishwasher pieces were still there, those often are missing!

barbieoldnewgreenredo

I sort of work backwards when designing a room or diorama space. I gather the furnishings first and then design the room. Just backwards from real life.


View from the GrandView side. This really only shows up occasionally in photos of the patisserie.
The door to the kitchen has been just a prop so far, always leading to where all the baking 'magic' supposedly happens.

The tape on the fridge is to keep everything controlled when not photographing. The door has led to nowhere, until now. I think I will paint the door a lovely blue on both sides.

I've been collecting pieces of what I thought was necessary for Sindy's commercial kitchen.

barbieoldnewgreenredo

Here is a good view of the sink unit with the dishwasher and 'fake' cabinetry, sprayed with silver paint. I'm missing the faucets, but I want a tall faucet and sprayer...we will see what I come up with. The counter tops were carefully applied contact paper in a speckled pattern that works super for 1:6 scale.
TIP: When going over rounded surfaces make cuts on the curves straight into the paper and apply one small piece at a time, overlapping your plastic  as you go.

The existing floor was too small, so I'm going to add to it--and then separate the whole thing from the Hotel, for storage. I will then be able to set the kitchen up independently for photo shoots. Now to match the floor exactly. I saved my printable flooring, but I have a new printer??? Or maybe I will just start with some new plywood. 

barbieoldnewgreenredo

One thing on Sindy's want list was a fridge and a microwave. This was a silver Mattel fridge/microwave, I just papered the window with actual bakery photos and touched up the pink accents to black and navy blue. This has the rotisserie flip in the microwave, I have a few of these and they are not so huge as the older model refrigerators.

barbieoldnewgreenredo

All the plastic pieces were given an alcohol cleaning and scraping and several sprays of silver spray paint. The oven door also has baking printed on it....I'm not sure I will use the hood (it's not painted). I thought it might interfere with photos, as I had originally planned to place it in the middle of the room.  Since I'm adding floor space, I can move it to a wall now. Maybe the vent hood will be added later.


barbieoldnewgreenredo

The door wall will be where the huge work table will be along with bins for supplies. This wood shelving piece will be used on the wall with supplies and tools.

barbieoldnewgreenredo

Sindy's Patisserie has an outdoor space and I may continue the walk near the outdoor table and add this window to the kitchen annex. I scavenged thrift stores for structures and if they are beyond using as is, I use them for parts. I think this Mattel window will work well on the street side.

This was my start for a commercial oven...made from scratch from a mahogany finish cigar box. 

barbieoldnewgreenredo


barbieoldnewgreenredo

Here I am measuring for height for Sindy. I ended up adding a hunk of 2x4 wood for the base, and pushpins for legs. Commercial ovens have a motor and venting system usually located on the floor level...so that made sense.

barbieoldnewgreenredo

I cut the existing cover into three pieces, for two bake ovens and a proofing oven for raising yeast breads. Fancy Schmancy...lol.

barbieoldnewgreenredo
The box was too deep so hubby sawed an inch off the back and sides. Thank goodness for power tools.  But, now I needed a new back...which used foam core covered with dull silver stickum paper.

barbieoldnewgreenredo

Nice clean look. This piece needed gray primer then silver spray paint.

barbieoldnewgreenredo

Shelves were needed inside.

barbieoldnewgreenredo

Not sophisticated, I sawed small stock for shelf brackets. After sanding and painting they worked fine.

barbieoldnewgreenredo

I did use a super glue...for instant add-some-finger-skin to your project's success.

barbieoldnewgreenredo

The doors are all pretty smooth, I used nails and screws in predrilled holes for attaching to the box.

barbieoldnewgreenredo

I searched commercial ovens and screen shot some photos, printed and used them glued on the doors. The bottom is still waiting for some sort of screening. On a commercial oven, motors and venting is done through this area. This piece is top heavy and will be velcro-ed to the walls.
One thing I need to create --a commercial mixer??? 

Can't wait to get to the fun part: walls, the work table, all the accessories and some vintage touches to match the age of the Grand View (Grand Hotel) building. 

Are You working on a
new spaces for your Dolls?

Tools used so far:
Power saw for cigar box
Drill, hand tool or electric
Screw driver
Exacto knives ...great for scraping, cutting, trimming
Glue-instant and wood glue
Small brushes
Scissors

Products used so far:
Spray paint satin silver
Acrylic craft paint, gray for priming wood pieces
Acrylic silver paint for wood pieces.
Paint markers, silver, white, black and blue.
Speckled contact paper
cigar box
1/4"x 1/4" wood cut to lengths for shelf brackets
Small shelves (thrift store)
Foam core scraps 
Silver contact paper for covering shelves
4 pushpins for oven legs, screws/nails for oven doors.
Photo copies of bakery in ovens and actual appliance doors size adjusted.
Modge-Podge or thinned white craft glue for attaching photo copies
Clear acrylic sealer (I tend to use satin)

Thanks for viewing and feel free to ask me any questions or inquiries, and I will get back to you.